summer dessert

Plum Upside-Down Cake

Plum Upside-Down Cake

JUMP TO RECIPE | PRINT RECIPE

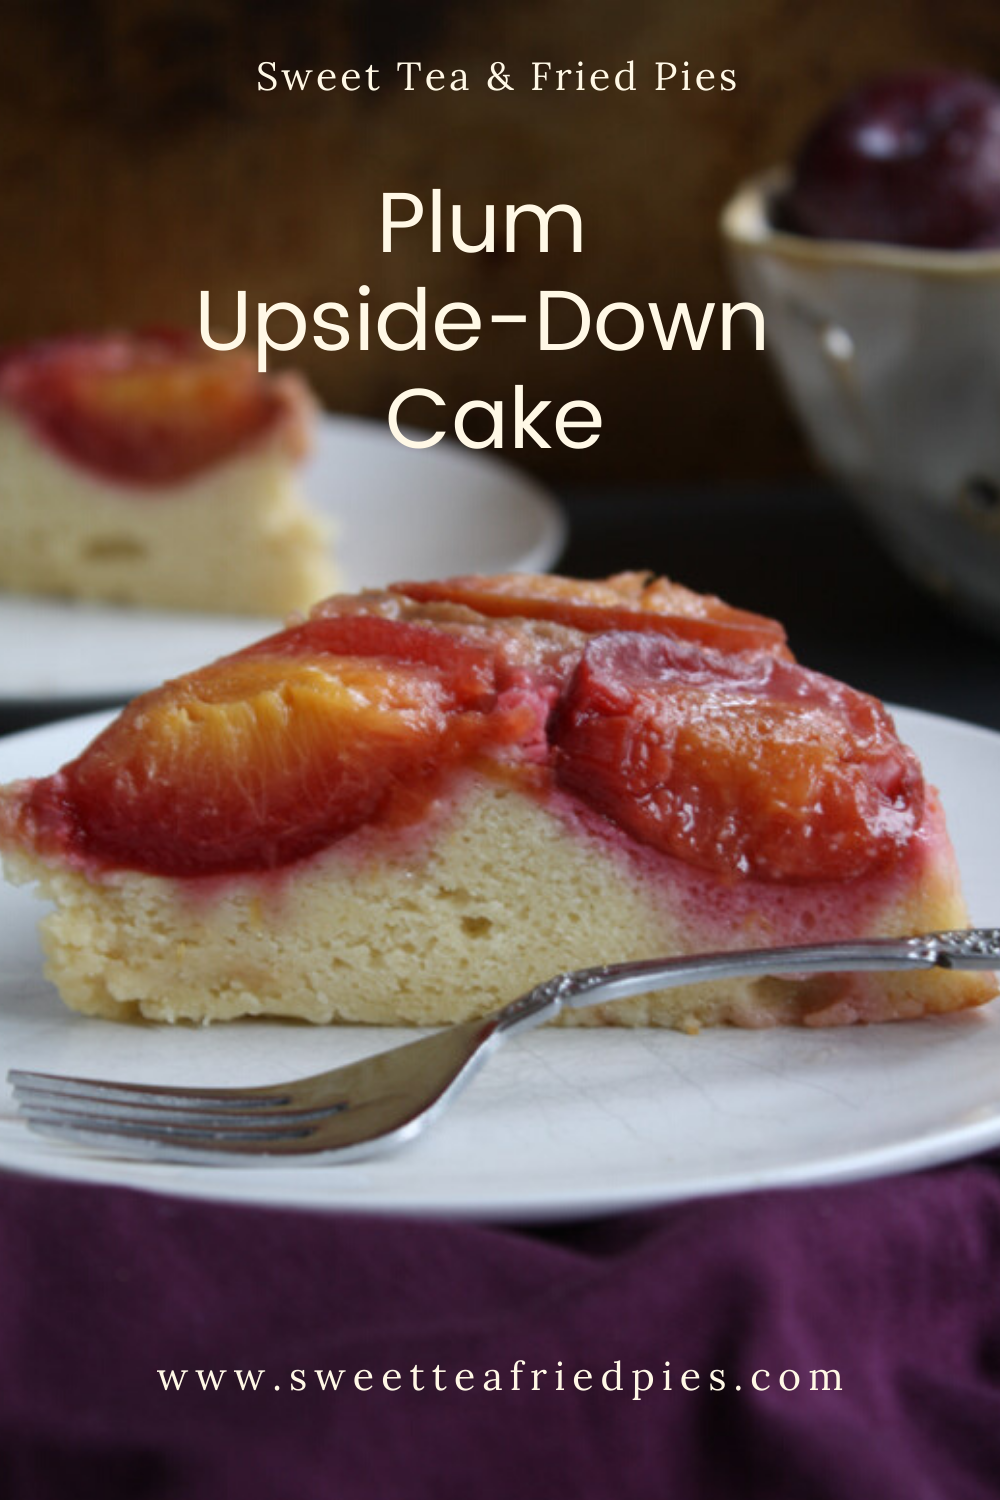
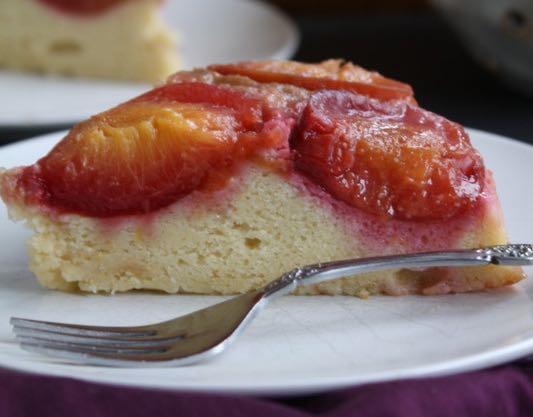
I’d like to stage a protest. National Pineapple Upside-Down Cake is on April 20. Don’t get me wrong, I like pineapple—my HB would agree that there’s absolutely nothing like ice-cold pineapple chunks especially on an oppressively hot summer day. But the syrupy cake’s popularity is overshadowing some potential contenders. Imagine a moist, buttery yellow cake topped with plums soaked in a ginger and rum-infused caramel sauce. If you drooled a little, I won’t tell. But, doesn’t that sound better than limp, canned pineapples and candy sweet cherries? 

This butter-based cake has a pound cake texture. Because of its neutral but rich flavor, I will definitely be making more cakes using this base. Achieving the cake’s lightness is all about creaming, a method of mixing sugar and softened butter.  More about that later. 

IMG_6498.jpg
IMG_6639.JPG

The flavor of this cake is carried by the plums, of course, but also by the butter, ginger, and rum. There are more varieties of plums than any other stone fruit in the world. The overall flavor of your cake will depend on the type of plums you use.  Plums bake well, and standard sweet plums I used blend well with butter.  And butter blends well with the warm, moderate flavor of rum and the hot spice of ginger in the caramel sauce elevate the whole bake. On her recipe card, my Mamaw noted that the cake is perfect on it’s own, but try topped with Greek yogurt or a sprinkle of powdered sugar. 

tips for making plum upside-down cake

So ready to protest with me and make a Plum Upside-Down Cake? The full recipe is below, but here are some tips to ensure your Plum Upside-Down Cake turns out perfectly each time. 

  •  I always use a stand mixer for cake making. I stop mixing when can no longer see streaks of flour, and finish by mixing by hand to make sure I don’t overwork the batter and all the flour is fully incorporated.

  • One of the crucial steps of making any butter cake, like this one, is creaming the sugar and butter. Sprinkle the sugar in slowly. It will turn pale and fluff up in volume as the sugar dissolves.

  • For fluffier results, it’s essential that all ingredients—eggs, buttermilk and butter—should be room temperature before you get started. Take your cold ingredients out at least two hours before you start baking. 

  • You also get to practice your knife skills with this recipe. Use a paring knife to cut the plums in half through the center, twist and separate. Remove the pits. If the pits don't come out easily, use your paring knife to carefully cut them out.

  • Did you know you can peel ginger root with a spoon? Use the back of a teaspoon to scrape the skin of ginger root, and then grate using a fine grater.  

  • The cake is done when it shrinks slightly from the sides of the pan. A toothpick or cake tester inserted in the center should come out clean.

  • Refrigeration tends to dry out cakes. Even though it’s made with buttermilk and butter, Plum Upside-Down Cake does not typically need to be refrigerated if your space is cooler than 70 degrees.

IMG_6622.JPG
IMG_6521.JPG

useful tool for making plum upside-down Cake
Like this recipe? Follow me on Instagram for lots more recipes just like this one! And don’t forget to pin this recipe to Pinterest for later by clicking on the image below.

Plum Upside Down Cake Pinterest Graphic-2.png

Yield: 8
Author:
Print
Plum Upside-Down Cake

Plum Upside-Down Cake

Imagine a moist buttery yellow cake topped with plums soaked in a rum-infused caramel. If you drooled a little, I won’t tell. Perfect on it’s own but try topped with Greek yogurt or a sprinkle of powdered sugar.
Prep time: 15 MCook time: 45 MTotal time: 60 M

Ingredients:

  • 6 to 8 small plums, depending on their size
  • 6 tablespoons unsalted butter
  • ½ cup dark brown sugar
  • 2 tablespoons dark rum
  • 2 teaspoons grated fresh ginger
  • ½ cup unsalted butter, softened
  • 1 cup granulated white sugar
  • 2 teaspoons vanilla
  • 2 large eggs, room temperature
  • 1½ cups all-purpose flour
  • 3 teaspoons baking powder
  • Pinch of salt
  •  1⅓ cup buttermilk, room temperature

Instructions:

  1. Preheat oven to 350 degrees.
  2. Prepare a 9-inch round cake pan by tracing the bottom of the cake pan onto parchment paper with a pencil, and cut along the line. Spray the bottom and sides of the pan with cooking spray and line with the prepared round of parchment paper, smoothing out to remove any creases or air bubbles. Spray the parchment paper then add a couple tablespoons of flour and shake it around the pan until the interior surface is lightly and completely covered. Discard any excess flour.
  3. Use a paring knife to cut the plums in half through the center, twist and separate. Remove the pits. If the pits don't come out easily, use your paring knife to carefully cut them out. Line the bottom of your cake pan with the plums cut sides down so they fit snuggly in the pan.
  4. Make your caramel by combining the dark brown sugar and butter in a heavy saucepan. Cook over medium-high heat until the sugar has dissolved, about 1 minute. Continue to cook, swirling the pan occasionally but never stirring the sugar mixture, until the mixture thickens and is bubbling on top, 3 to 5 minutes. Remove the pan from the heat and stir in the rum and fresh ginger. Pour caramel over plums and set aside.
  5. In the bowl of a standing mixer fitted with the paddle attachment, beat the remaining ½ cup of butter, granulated white sugar and vanilla until light and fluffy. Add eggs, one at a time, beating well after each addition.
  6. In a separate bowl, whisk together flour, baking powder, and pinch of salt.
  7. Gradually add flour mixture to butter mixture, alternating with buttermilk and starting and ending with flour mixture.
  8. Pour cake batter over plum and caramel mixture, and bake for about 45 to 60 minutes until tester inserted in the center comes out clean. Cake should be a light golden color, slightly domed on top and center should spring back to the touch.
  9. The cake top may crack slightly while baking as the moisture releases from the fruit and juices may spill from your cake. To avoid a messy oven clean up, place a cookie sheet on the rack below your cake to catch any spills.
  10. Let cake cool 10 minutes before inverting onto serving plate. Serve topped with yogurt or sprinkle with powdered sugar.
Variation
  1. Not a plum fan? Try apricots, nectarines, pluots, or peaches instead. All will pair nicely with the rum and ginger flavors.

Calories

474.93

Fat (grams)

22.09

Sat. Fat (grams)

13.20

Carbs (grams)

63.43

Fiber (grams)

1.46

Net carbs

61.98

Sugar (grams)

43.97

Protein (grams)

5.98

Sodium (milligrams)

301.36

Cholesterol (grams)

101.52
Did you make this recipe?
Tag @sweetteafriedpies on instagram and hashtag it #sweetteafriedpies
Created using The Recipes Generator

Lemon Cream Tart with Berries

Lemon Cream Tart with Fresh Blueberries

JUMP TO RECIPE | PRINT RECIPE

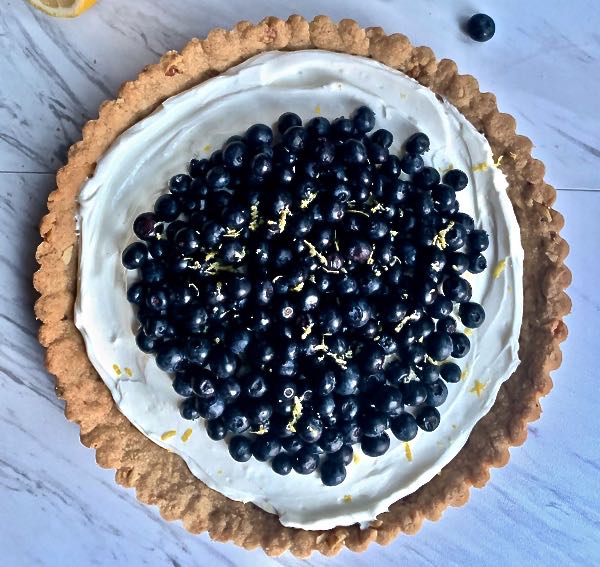
In their 1989 cookbook classic The New Basics, Rosso and Lukins write, “For every chocoholic in the world, there must be one lemonphile.” I am that one.  If I could put lemons in everything, I shamelessly would (and shamelessly do). I love lemons.  I also love creamy desserts and have so much love for cookies that I can’t keep them in the house. Because this tart combines all three, its clearly one of my favorites and, now you know, the way to quickly becoming my new best friend. Using my Mamaw’s nut cookie crust recipe, the combination of a cool creamy filling, subtly sour blueberries, and zesty lemon turns this simple tart into a crowd pleaser—even if you’re not a lemonphile.

This tart works well because of the balance between the berries and lemon. It’s all about volume or, in other words, the intensity of the flavor of each ingredient. Lemons are loud when it comes to its flavor volume while berries are a bit on the quiet side. Because no cooking is required for the filling, this tart also comes together very quickly making it perfect for that summer barbecues you almost forgot about. Lemon enhances many flavors, so it pairs nicely with any type of berries. For a twist, instead of blueberries, try topping this tart with roasted strawberries or sliced kiwi.

IMG-7967.jpg

What is A blind baking?

Making homemade tart crust may seem intimidating, especially when it comes words like “blind baking”. But you don’t scare easily. And with anything, the process becomes much easier and faster after a few tries. You’ll discover the results are well worth the practice.

 Blind baking just means that you’re baking the crust before you add the filling. To blind bake this tart crust, press in your crust and then line it with parchment or aluminum foil. Weigh it down with something, like pie weights, uncooked rice or uncooked beans, so that the bottom doesn’t puff and the sides don’t slouch as you bake it.

Unbaked Cookie Nut Pie Crust copy.JPG

Once the crust is set — and you’ll know because the edges will turn golden brown —remove foil and the weights and let the crust bake a little longer. Look for the bottom to turn a light golden. It should take no more than 15 or 20 minutes.

Huzzah! You’ve just completed a blind bake! I love using a 9-inch fluted tart pan with a removable bottom, and pie weights when I make this recipe.

Lemon+Cream+Tart-2.jpg

tips for making creamy lemon tart

Fruit tarts, like this one, follow a simple formula – an open, sturdy, sweet crust + filling + fruit. The full recipe is below, but here are some tips to ensure your Lemon Cream Tart turns out perfectly each time. 

  • Short crust pastry like the nut cookie crust used in this recipe will puff up during your blind bake. Use pie weights (see above) or prick the crust all over with a fork just before putting in the oven. Use the back of a spoon to smooth down the crust if it puffs up a bit after baking.

  • I don’t typically suggest this when it comes to baking tart shells, but because the fat content is a bit on the lower side, you may want to lightly coat your tart pan with cooking spray before pressing in your pastry. It’ll help with the release.

  • Bake the unfilled tart shell in the middle of your oven. Once baked, the shell should shrink away from the sides of the pan. When the tart is completely cool, remove the outside ring but keep the tart on the bottom pan. It’ll be easier to serve that way.

  • Since you will be using the peel, be sure to scrub your lemon under hot water to remove the wax.

  • The lemon zest adds a totally different dynamic than lemon juice. Juice adds tartness and the zest adds a mellow, perfumed flavor. To zest the lemon, rub the lemon with a fine grater 2 to 3 times to remove the zest. Be careful not to rub too much and get the bitter white pith.

  • The secret weapon to getting gleaming, Instagram-worthy berries atop your tart is jelly. Microwave ¼ to ½ cup of apple jelly for 30 seconds, until liquid. Toss with berries in large bowl, and then spoon over the filling. Chill in the refrigerator for at least 1 hour until the jelly has set. 

useful tool for making lemon tart

Like this recipe? Follow me on Instagram for lots more recipes just like this one! And don’t forget to pin this recipe to Pinterest for later by clicking on the image below.

Lemon Cream Tart Pinterest Graphic.png

Yield: 8
Author:
Lemon Cream Tart with Fresh Blueberries

Lemon Cream Tart with Fresh Blueberries

Cool creamy filling, subtly sour blueberries, and zesty lemon turn this simple tart into a crowd pleaser
Prep time: 40 MCook time: 1 H & 20 MTotal time: 1 H & 60 M

Ingredients:

CRUST
  • ½ cup unsalted butter, softened
  • ⅓ cup packed brown sugar
  • 1¼ cup flour
  • ½ cup chopped pecans or almonds
  • ¼ teaspoon salt
  • ¼ teaspoon baking soda
  • ½ teaspoon vanilla extract
FILLING
  • 8 oz. soften cream cheese
  • ½ cup of plain Greek yogurt
  • ¼ cup powdered sugar
  • 1 teaspoon of lemon extract
TOPPING
  • 1 to 2 cups fresh blueberries
  • 1 teaspoon fresh lemon zest
  • ½ cup apple or blueberry jelly (OPTIONAL)

Instructions:

  1. Preheat oven to 350 degrees. Prepare tart pan by lightly spraying with cooking spray.
  2. To make the crust, cream the butter and brown sugar together in a large bowl until fluffy and fully combined. Stir in other ingredients until crumbly. Transfer the dough to a prepared tart pan and press it over the bottom and up the side all around.
  3. Line the unbaked tart crust with parchment or aluminum foil and weigh it down with pie weights, uncooked rice or uncooked beans, so that the bottom doesn’t puff and the sides don’t slouch.
  4. Bake at 350 degrees for 10 minutes, and then remove aluminum foil and pie weights and bake for additional 10 minutes or until golden brown. Let crust completely cool before filling.
  5. Meanwhile make the filling. Use a hand mixer to combine soften cream cheese and yogurt. Add powdered sugar and lemon extract; mix until thoroughly combined.
  6. Spread filling into a completely cool crust and refrigerate for 1 hour until firm.
  7. Microwave ½ cup of blueberry jelly for 30 seconds, until liquid. Toss with berries in large bowl, and then spoon over the filling. Chill in the refrigerator for at least 1 hour until the jelly has set.
  8. Top lemon zest just before serving.

Calories

332.90

Fat (grams)

18.03

Sat. Fat (grams)

8.36

Carbs (grams)

40.13

Fiber (grams)

1.82

Net carbs

38.30

Sugar (grams)

20.76

Protein (grams)

4.64

Sodium (milligrams)

131.07

Cholesterol (grams)

34.79
Did you make this recipe?
Tag @sweetteafriedpies on instagram and hashtag it #sweetteafriedpies
Created using The Recipes Generator