Fudgy Brownies

Fudgy Brownies

JUMP TO RECIPE | PRINT RECIPE

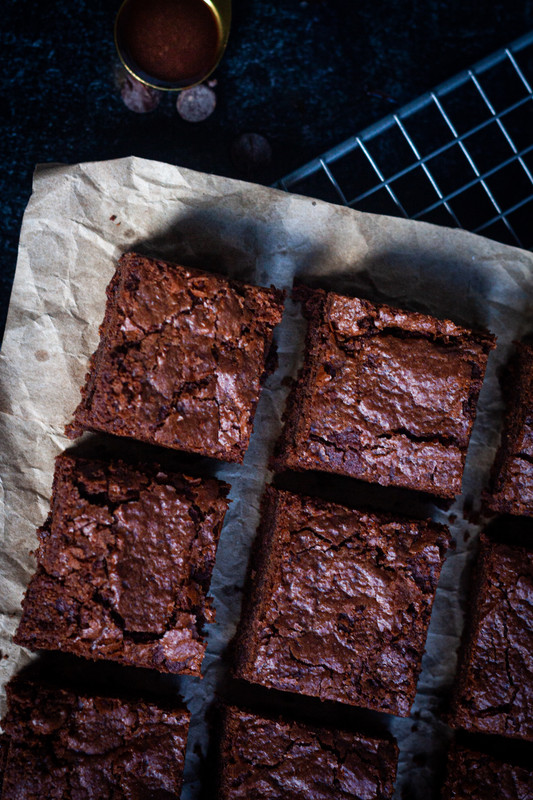
When I first tested Mamaw’s recipe, I had a total baking fail and ended up with brownie soup. I’m not sure what I did to achieve such a disastrous baking feat, but I suspect my Aunt Rhunda may have some clues—more about that story later. These fudgy brownies are reminiscent of their 19th century Chicago cousins but with the extra boost of butter.

Remember, brownies are a celebration of chocolate, making quality of the chocolate important. So splurge a little and get the best chocolate you can afford!
Cakes - unedited-4.jpg

Yield: 24 brownies
Author: Sweet Tea & Fried Pies
Fudgy Brownies

Fudgy Brownies

When I first tested Mamaw’s recipe, I had a total baking fail and ended up with brownie soup. I’m not sure what I did to achieve such a disastrous baking feat, but I suspect my Aunt Rhunda may have some clues. These fudgy brownies are reminiscent of their 19th century Chicago cousins but with the extra boost of butter. Brownies are a celebration of chocolate, making quality of the chocolate important. So splurge a little and get the best chocolate you can afford.

Ingredients

  • 1 cup unsalted butter
  • 10 ounces semisweet chocolate chips
  • 1 cup firmly packed brown sugar
  • 1 cup granulated sugar
  • 2 large eggs, room temperature
  • 1 tablespoon vanilla extract
  • 2 cups self-rising flour
  • 1 cup walnuts (optional)

Instructions

  1. Preheat the oven to 400°F and line a 9 x 13-inch baking dish with parchment paper leaving about one inch hanging over the sides.
  2. In a large saucepan, melt the butter and the chocolate chips over low heat until smooth. Whisk in the sugars until fully incorporated. Remove from heat and let the chocolate mixture cool to room temperature (about 5 minutes).
  3. Add the eggs and the vanilla extract and whisk until smooth and homogeneous. Add the flour and mix with a rubber spatula until combined. Fold in the nuts, if using.
  4. Scrape batter into the prepared pan and spread into an even layer. Bake for 30 to 35 minutes or until a toothpick inserted halfway between edge and center comes out with just a few moist crumbs attached. Transfer the pan to a wire rack and cool for 1½ hours.
  5. Using the parchment paper overhang, lift the brownies from pan. Place the brownies on the wire rack and cool completely, an additional hour. Cut into 2-inch squares and serve. Brownies can be stored in an airtight container at room temperature for up to 4 days.

Calories

258.45

Fat (grams)

14.55

Sat. Fat (grams)

7.28

Carbs (grams)

31.77

Fiber (grams)

1.27

Net carbs

30.50

Sugar (grams)

22.36

Protein (grams)

2.80

Sodium (milligrams)

134.88

Cholesterol (grams)

35.84
Did you make this recipe?
Tag @sweetteafriedpies on instagram and hashtag it #sweetteafriedpies

Like this recipe? Follow me on Instagram for lots more recipes just like this one! And don’t forget to pin this recipe to Pinterest for later by clicking on the image above.

Cherry Hand Pies

Cherry Hand Pies

JUMP TO RECIPE | PRINT RECIPE

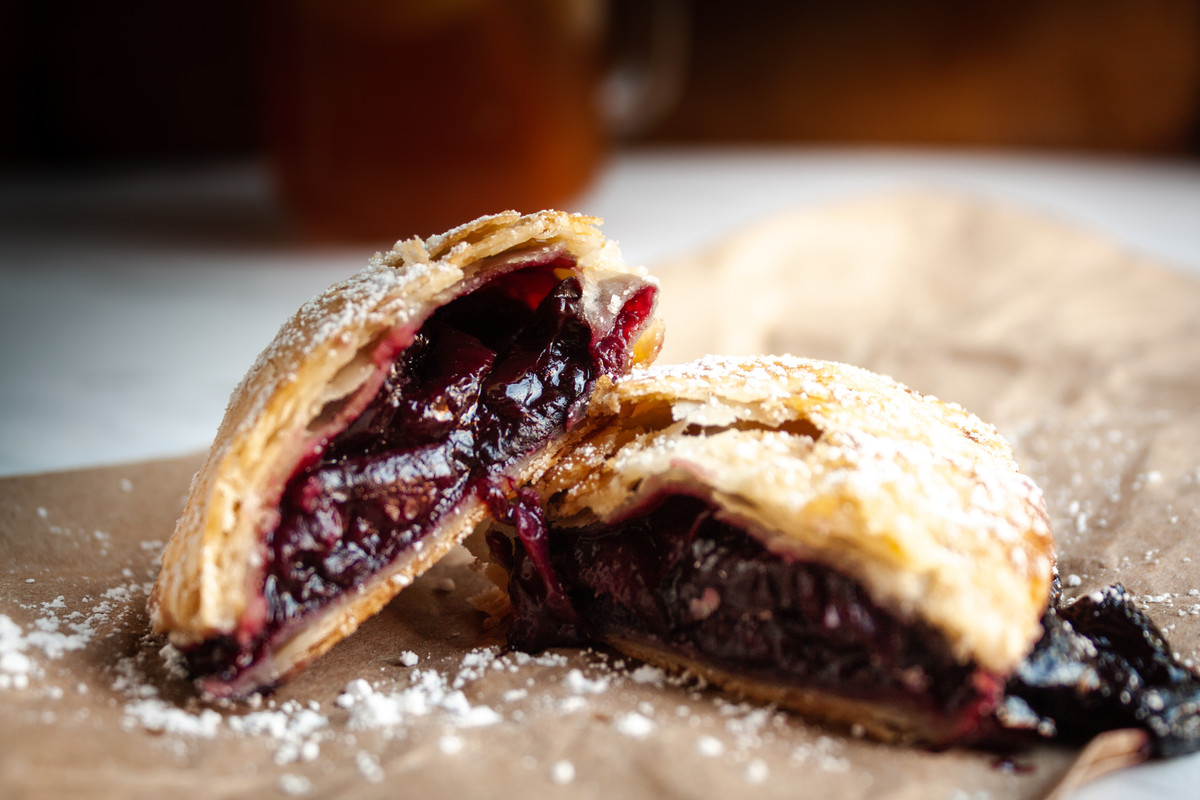
Sweet cherries, flaky crust, and powdered sugar form this perfect handmade hand pie. Perfect for summertime picnics and barbecues.

Cherry Hand Piev1- Cookbook.jpg
Cherry Hand Piev2- Cookbook.jpg

USEFUL TOOLS TO MAKE HAND PIES

Like this recipe? Follow me on Instagram for lots more recipes just like this one! And don’t forget to pin this recipe to Pinterest for later by clicking on the image below.


Yield: 8
Author: Sweet Tea & Fried Pies
Print
Cherry Hand Pie

Cherry Hand Pie

Sweet cherries, flaky crust, and powdered sugar form this perfect handmade hand pie. Perfect for summertime picnics and barbecues.
Prep time: 20 MCook time: 30 MTotal time: 50 M

Ingredients:

CRUST
  • 2 cups all-purpose Flour 
  • 1 teaspoon salt
  • 3⁄4 cup shortening
  • 1⁄3 cup tap water
  • 1 tablespoon whole milk
  • 1 large egg, beaten
FILLING
  • 1 pound frozen cherries
  • 1⁄2 teaspoon almond extract
  • 1⁄4 cup granulated sugar
  • 1 tablespoon cornstarch
  • 1 tablespoon water powdered sugar

Instructions:

  1. Make the crust by mixing flour and salt with a wire pastry blender. Cut in half of the shortening and blend until it looks like cornmeal. Cut in remainder of shortening until it looks like peas. Add water one tablespoon at a time, tossing flour and water until evenly dampened. Shape into a firm ball and let rest 10 minutes.
  2. In a medium saucepan, heat cherries, almond exract, and sugar over medium- high heat. After the cherries loose considerable juice, which may take a few minutes, remove from heat.
  3. In a small bowl, mix water and cornstarch together. Add to cherry mixture to thicken.
  4. Preheat oven to 350 degrees. Line baking sheet with parchment paper.
  5. Roll dough between two pieces of parchment paper to 1⁄8 to 1⁄4  inches thickness.
  6. Cut out 4-, 5- or 6-inch rounds, depending on how large you prefer. Add about 2 tablespoons of filling to each hand pie and fold the dough over in half to enclose the filling. Use a fork to press and seal the edges closed. Transfer pies onto prepared baking sheet.
  7. Whisk egg with milk in a small bowl. Brush top of each hand pie with egg wash. Cut 3 small vent holes in the top of each pie.
  8. Bake in the preheated oven until pies are golden brown and filling is bubbling, 25 to 30 minutes. Let cool for at least 15 minutes. Dust with powdered sugar before serving.

Calories

410.02

Fat (grams)

20.43

Sat. Fat (grams)

8.08

Carbs (grams)

52.39

Fiber (grams)

1.76

Net carbs

50.63

Sugar (grams)

26.26

Protein (grams)

4.60

Sodium (milligrams)

276.19

Cholesterol (grams)

34.20
Did you make this recipe?
Tag @sweetteafriedpies on instagram and hashtag it #sweetteafriedpies
Created using The Recipes Generator

Orange Crush Sherbet

Orange Crush Sherbet

JUMP TO RECIPE | PRINT RECIPE

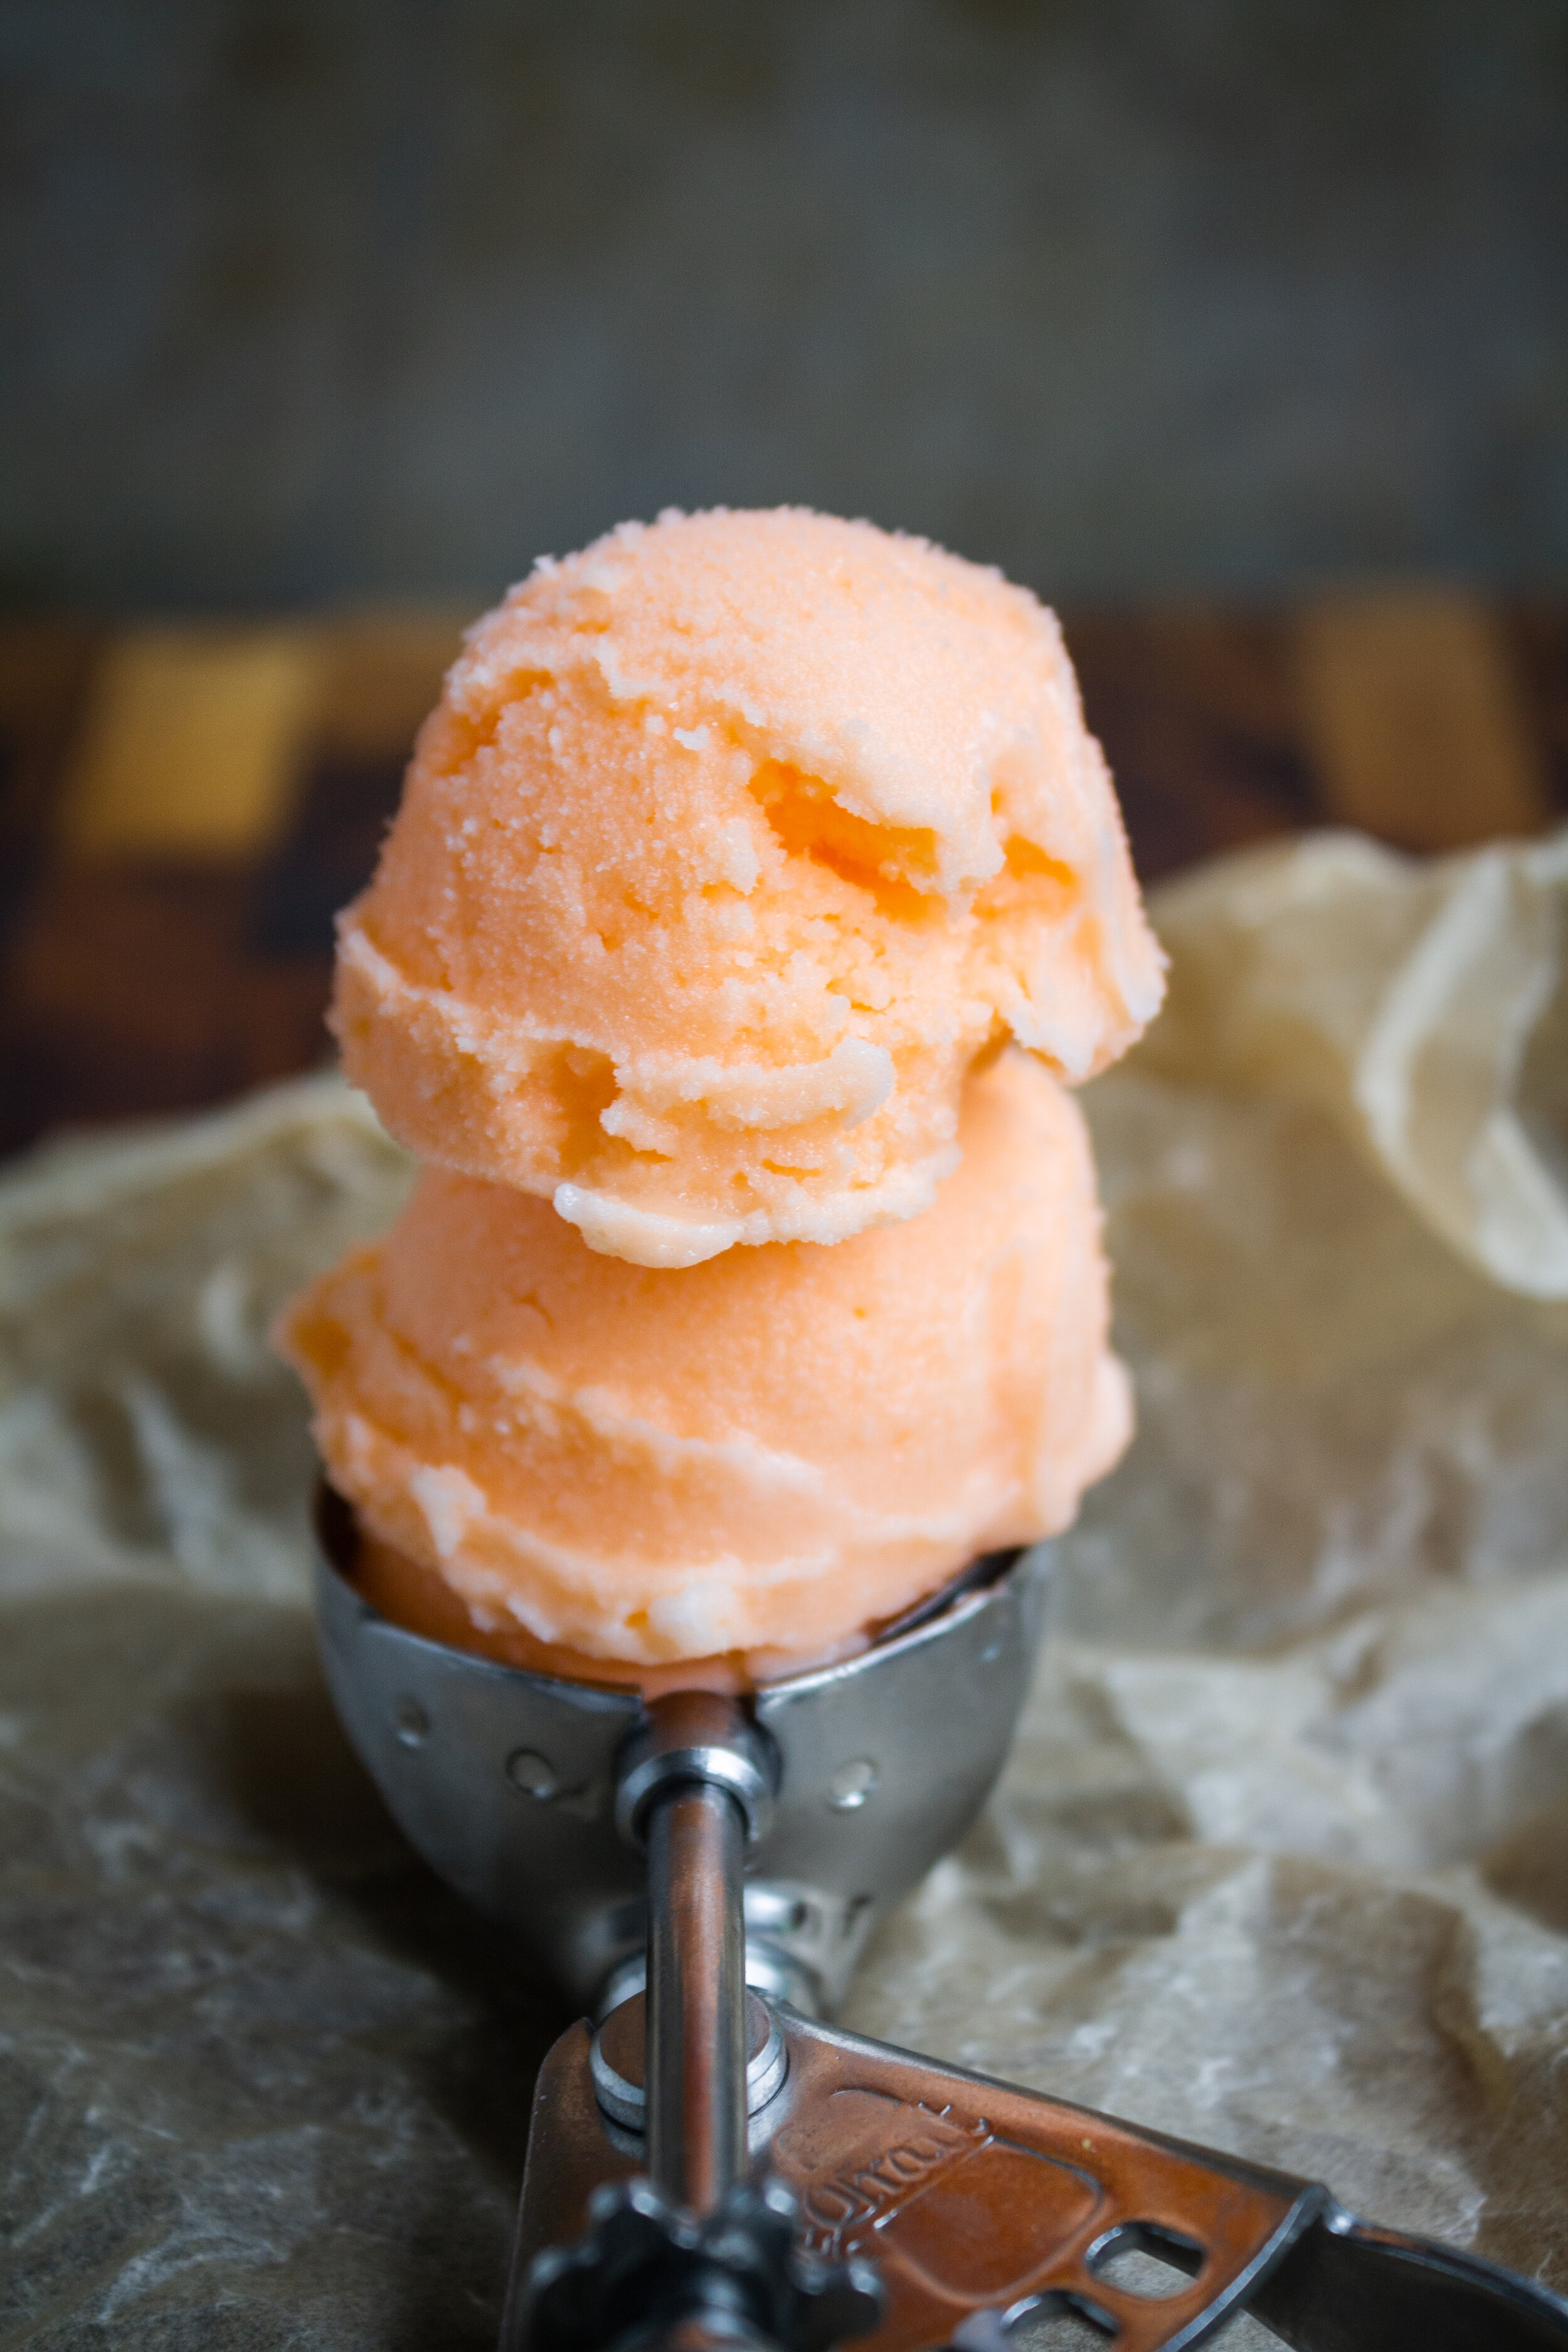
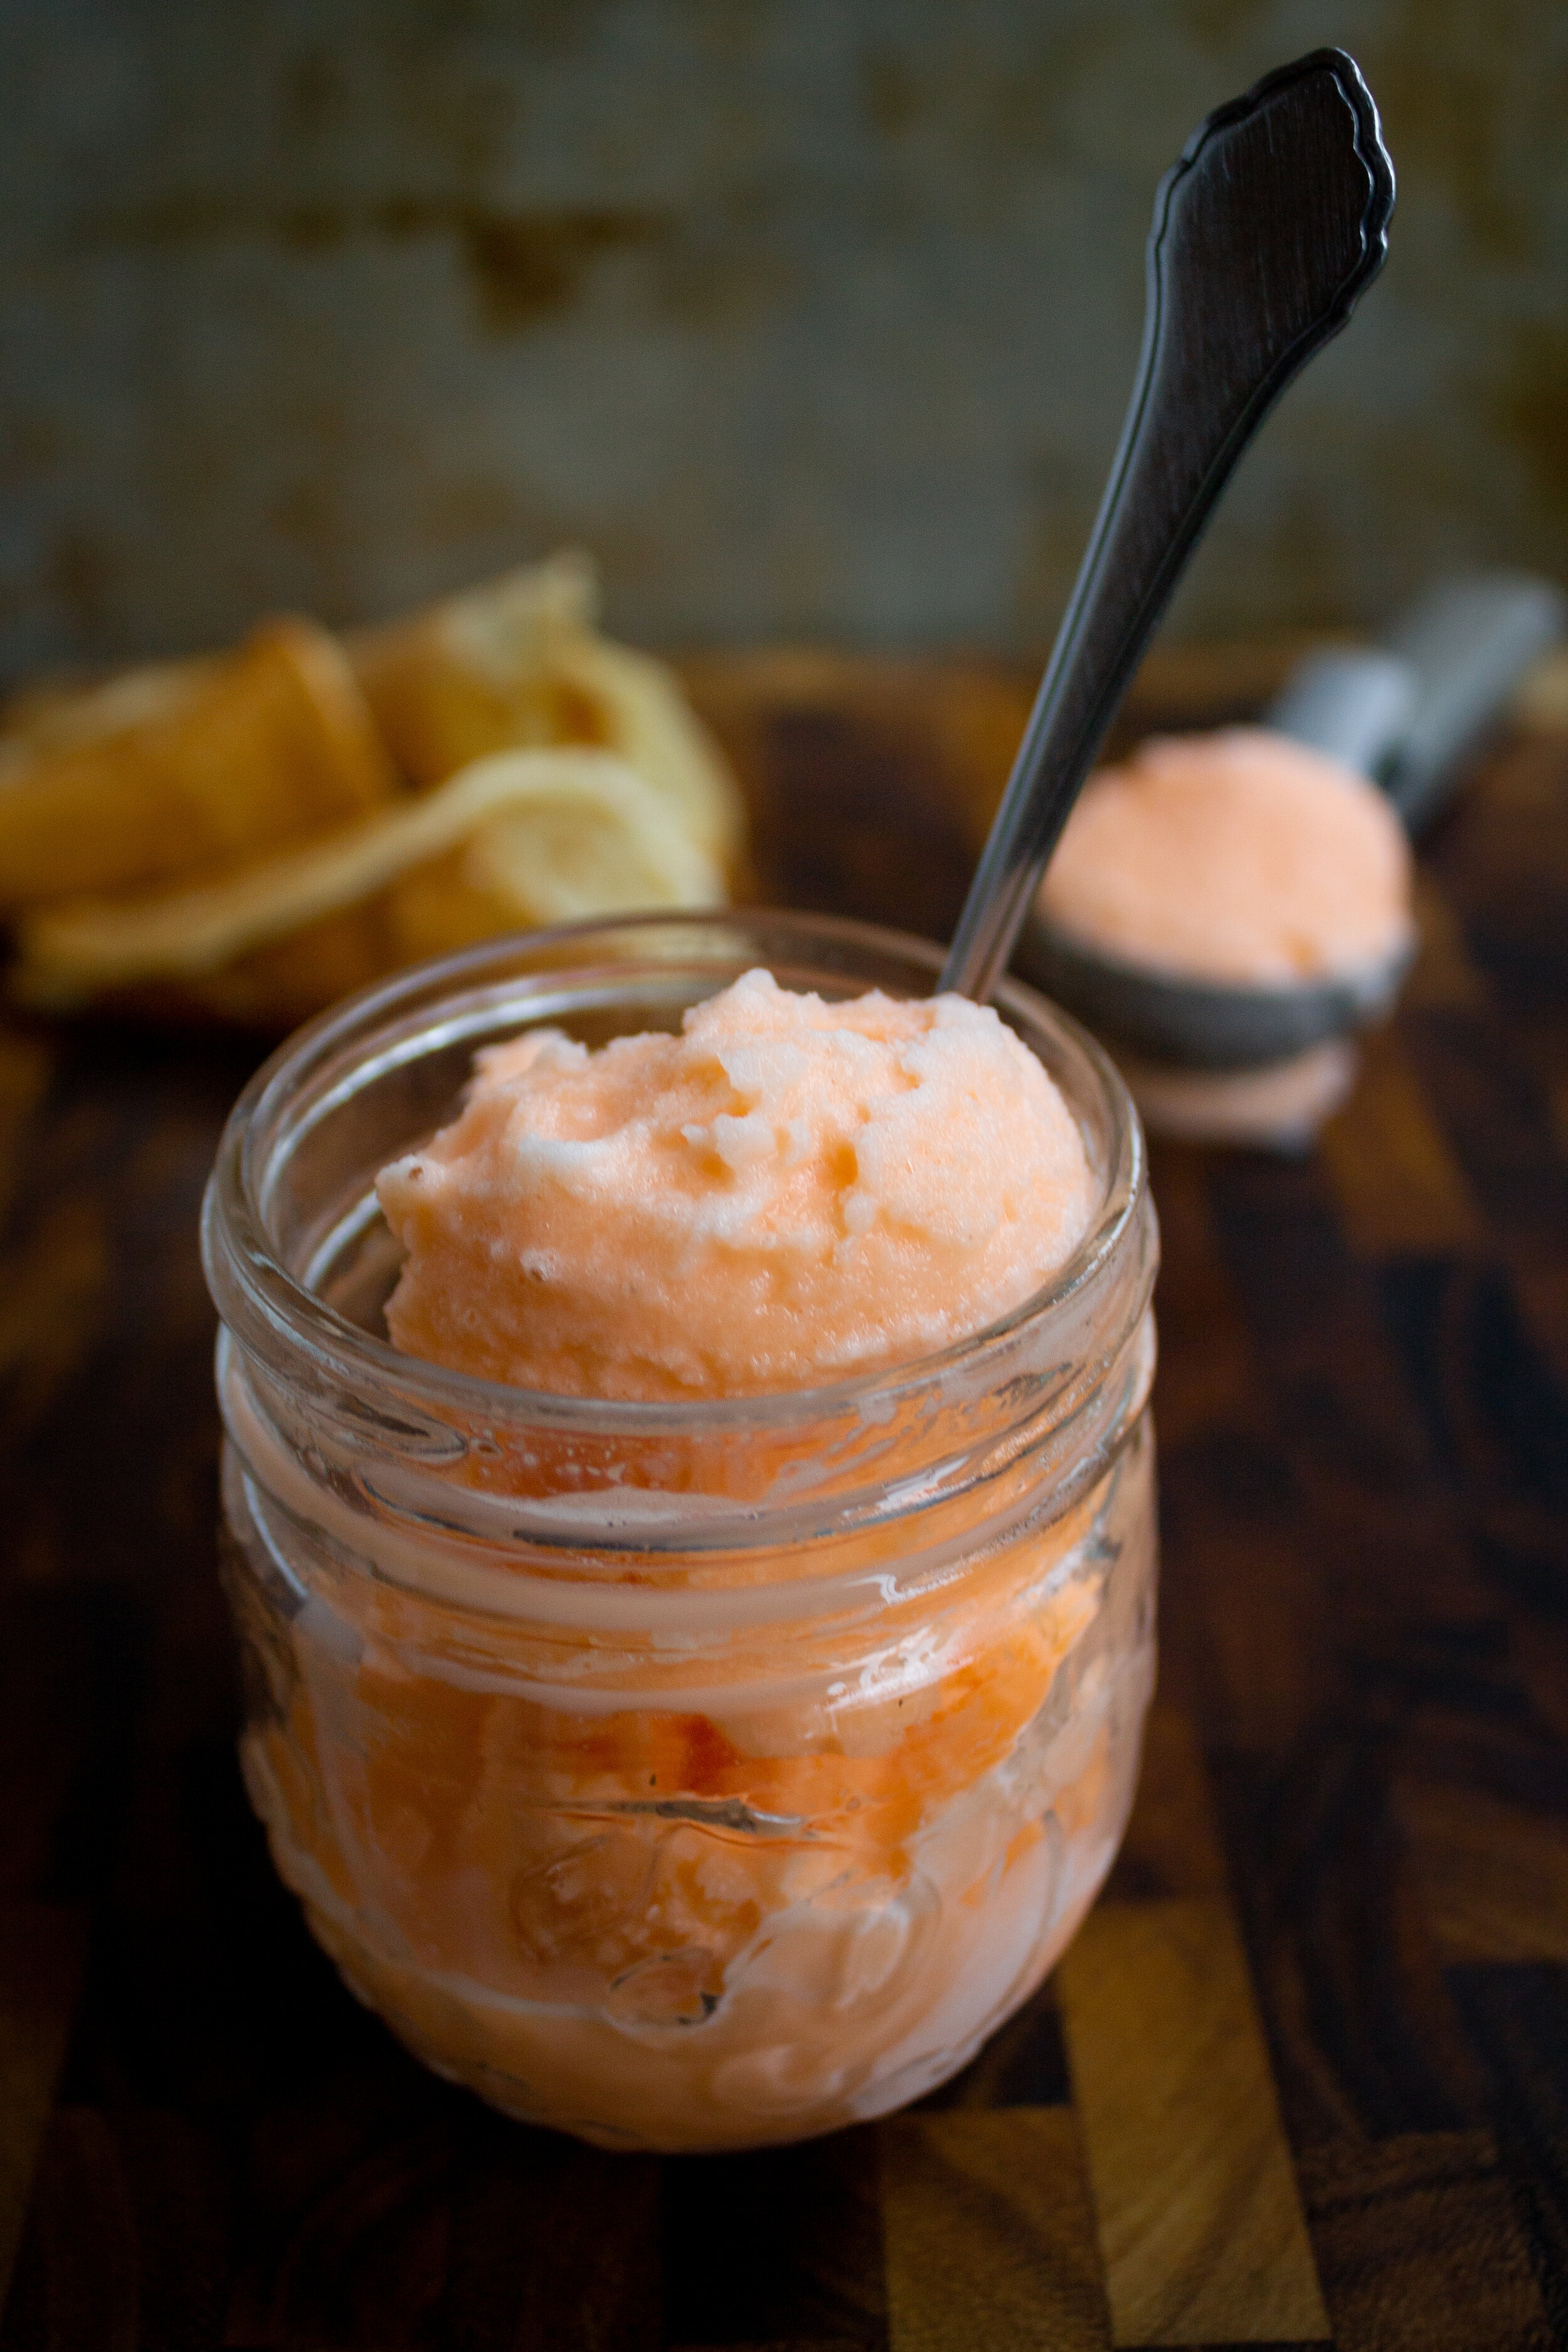
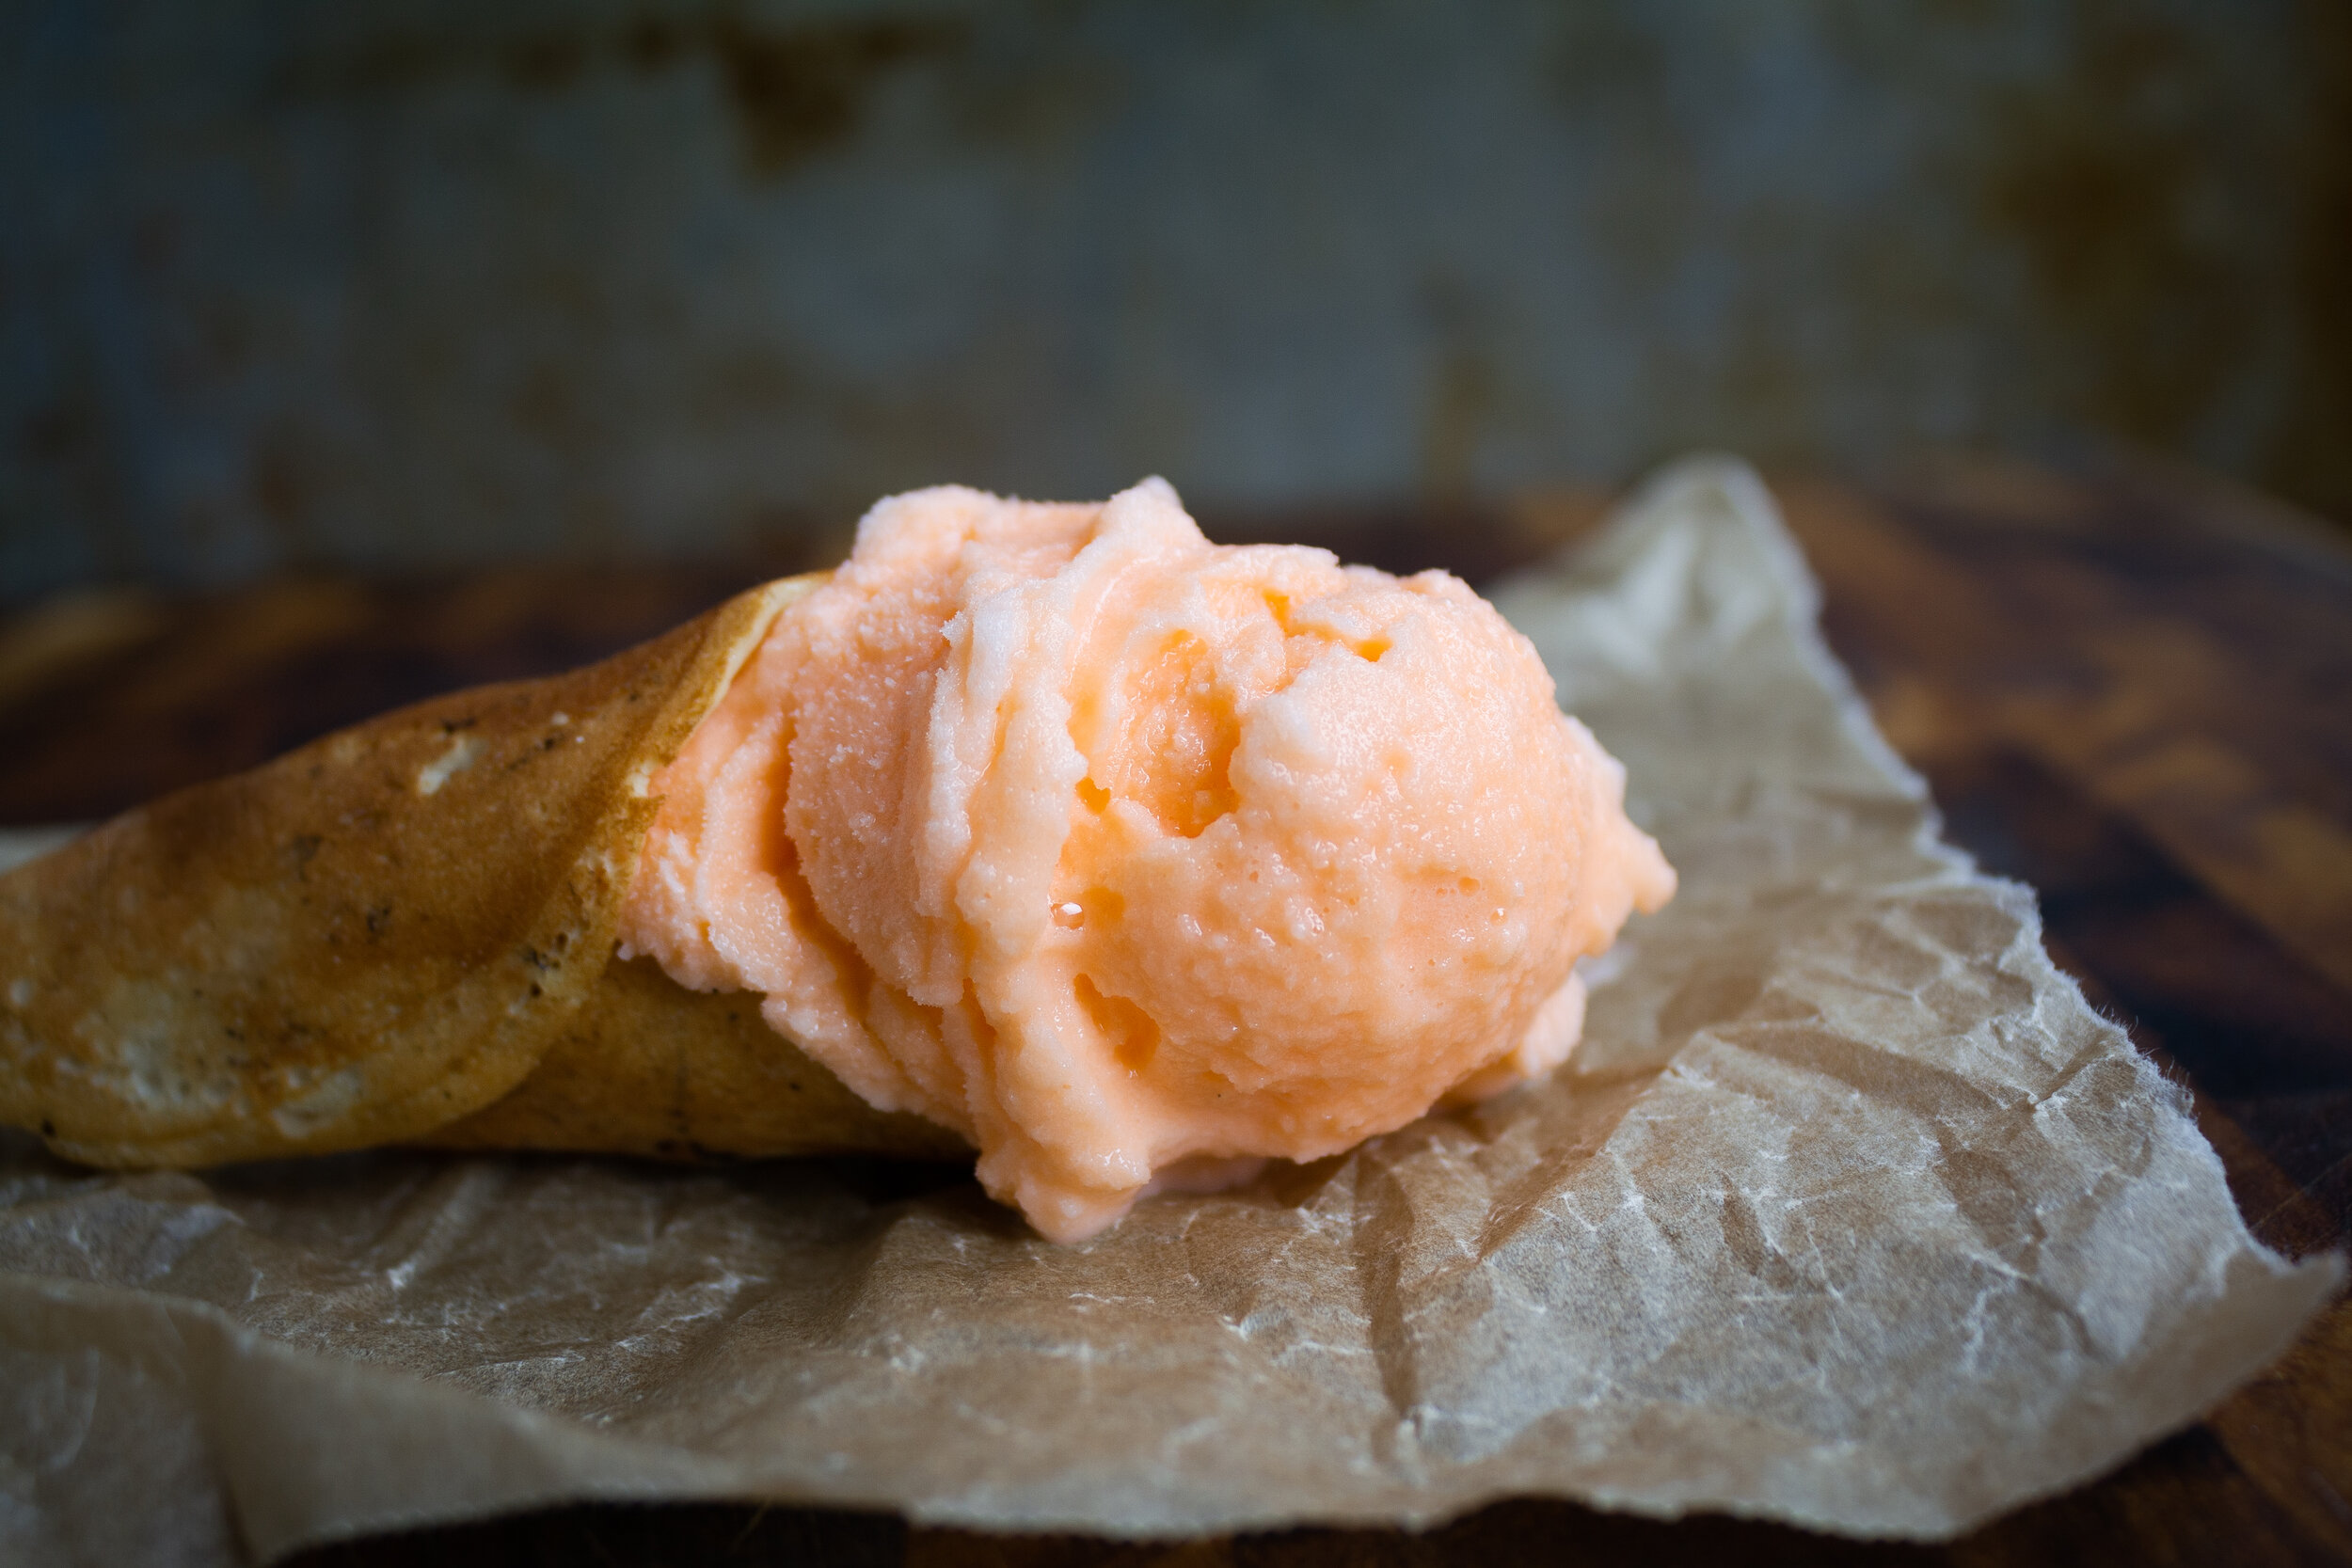
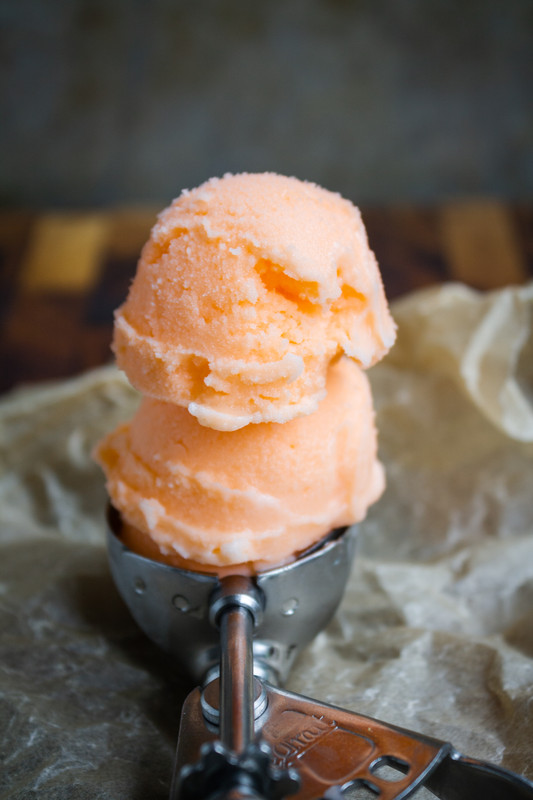
Homemade Orange Crush Sherbet churning away in my Mamaw’s old-fashion, wooden bucket-style ice cream maker on her carport is one of my all-time favorite childhood memories. My uncle and I remember being hypnotized by the machine’s churn and the science of how salt and ice magically turned liquid into such a deliciously creamy substance.

Mamaw’s two-ingredient sherbet was a summer staple and simple (oh, so simple) to make. It doesn’t require an old-fashion ice cream maker, but if you have one, dig it out!

Not an orange soda fan? You can make this with any fruit-flavored soda. Mamaw used this recipe to make grape, strawberry and lemon-lime sherbets.

IMG_7972.jpg
IMG_7930.jpg

useful tools to make orange crush sherbet

Like this recipe? Follow me on Instagram for lots more recipes just like this one! And don’t forget to pin this recipe to Pinterest for later by clicking on the image below.

IMG_8011.jpg

Yield: 2 quarts
Author: Sweet Tea & Fried Pies
Print
Orange Crush Sherbet

Orange Crush Sherbet

A summer favorite for my family, this two-ingredient sherbet comes together quickly! Try mixing in dark chocolate pieces or drained crushed pineapple for an extra special treat
Prep time: 5 MCook time: 6 hourTotal time: 6 H & 5 M

Ingredients:

  • 14 oz can of sweeten condensed milk 
  • 36 oz of Orange Crush

Instructions:

  1. In a large bowl mix together the soda and condensed milk. 
  2. Transfer sherbet a large pan or container. Cover with plastic wrap and place it in your freezer. Freeze until soft the consistency of soft serve—firm but not hard. Use a fork to break up sherbet. 
  3. Cover with a small piece of plastic wrap, sticking directly to sherbet Cover with a piece a parchment paper that fits just the surface of the  sherbet. Cover the pan tightly with more plastic wrap, and until firm, about 6 hours or overnight.

Notes:

Try mixing in a 1 cup of dark chocolate pieces or a 14 oz can of drained crushed pineapple for an extra special treat.

Calories

1108.40

Fat (grams)

24.03

Sat. Fat (grams)

14.76

Carbs (grams)

209.46

Fiber (grams)

11.22

Net carbs

198.23

Sugar (grams)

188.84
Protein (grams)

25.79

Sodium (milligrams)

344.71

Cholesterol (grams)

90.92
Did you make this recipe?
Tag @sweetteafriedpies on instagram and hashtag it #sweetteafriedpies
Created using The Recipes Generator

Lavender Blackberry Ice Cream Sandwiches

Lavender Blackberry Ice Cream Sandwiches

JUMP TO RECIPE | PRINT RECIPE

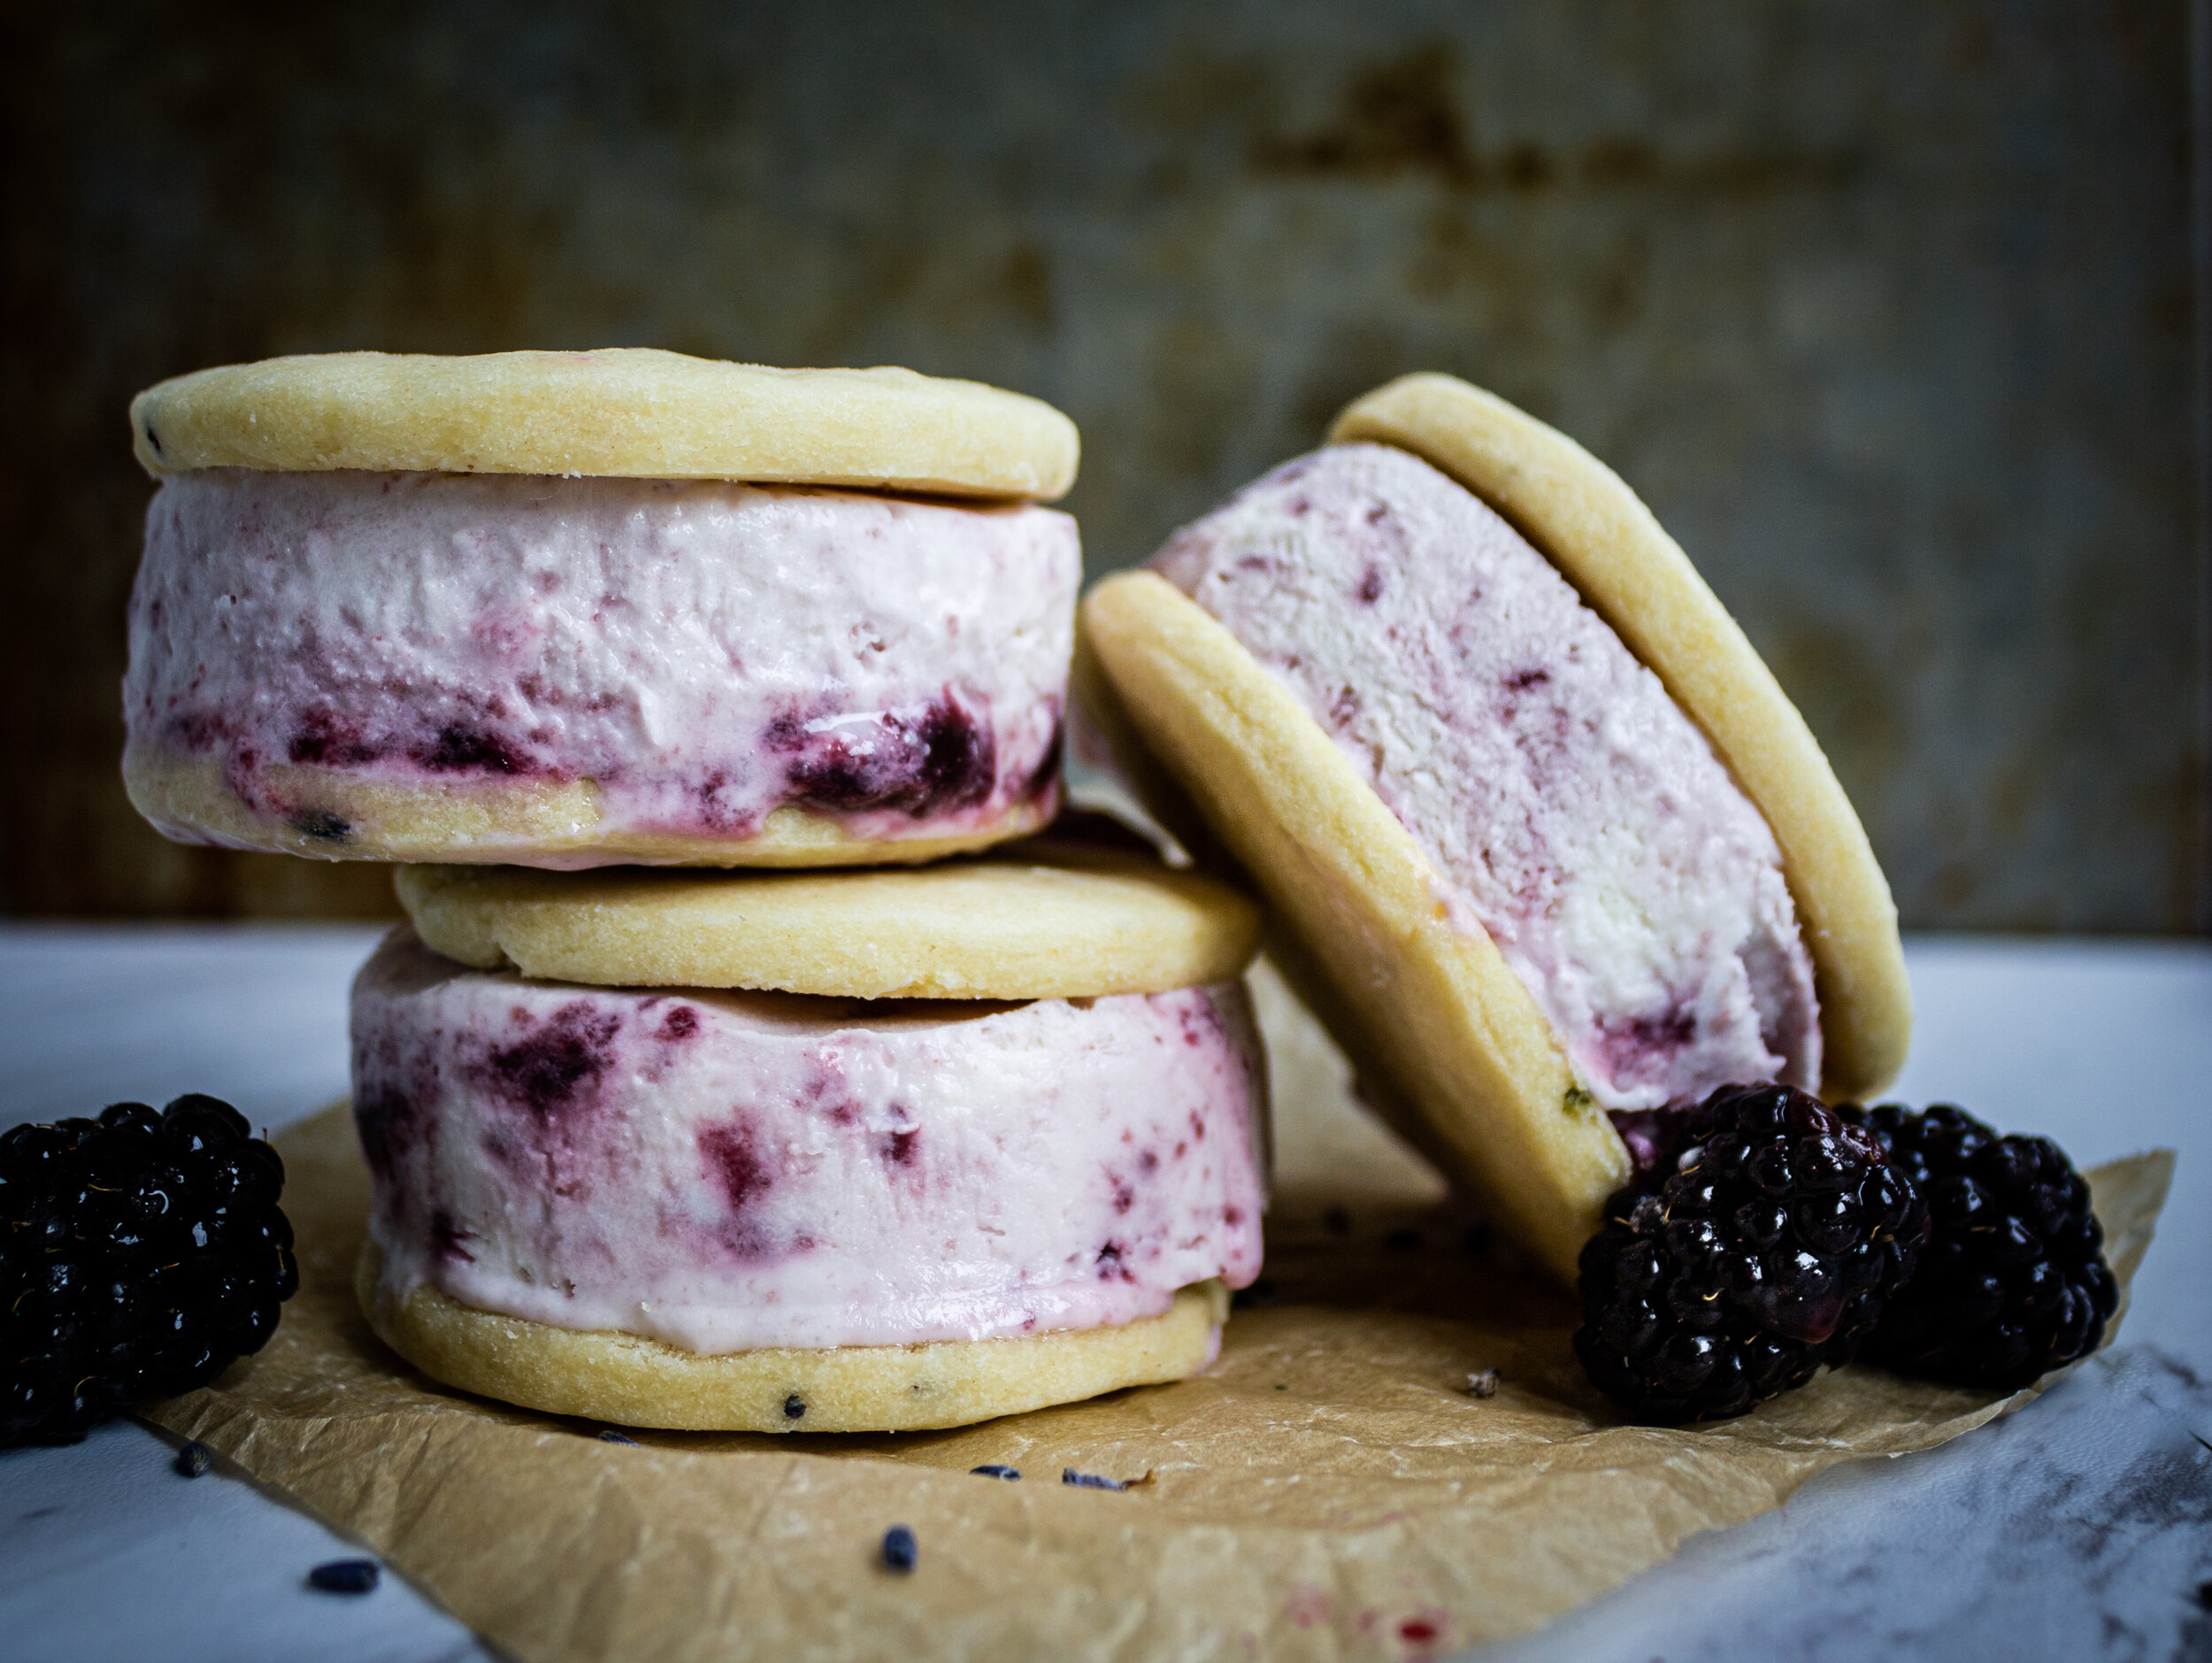
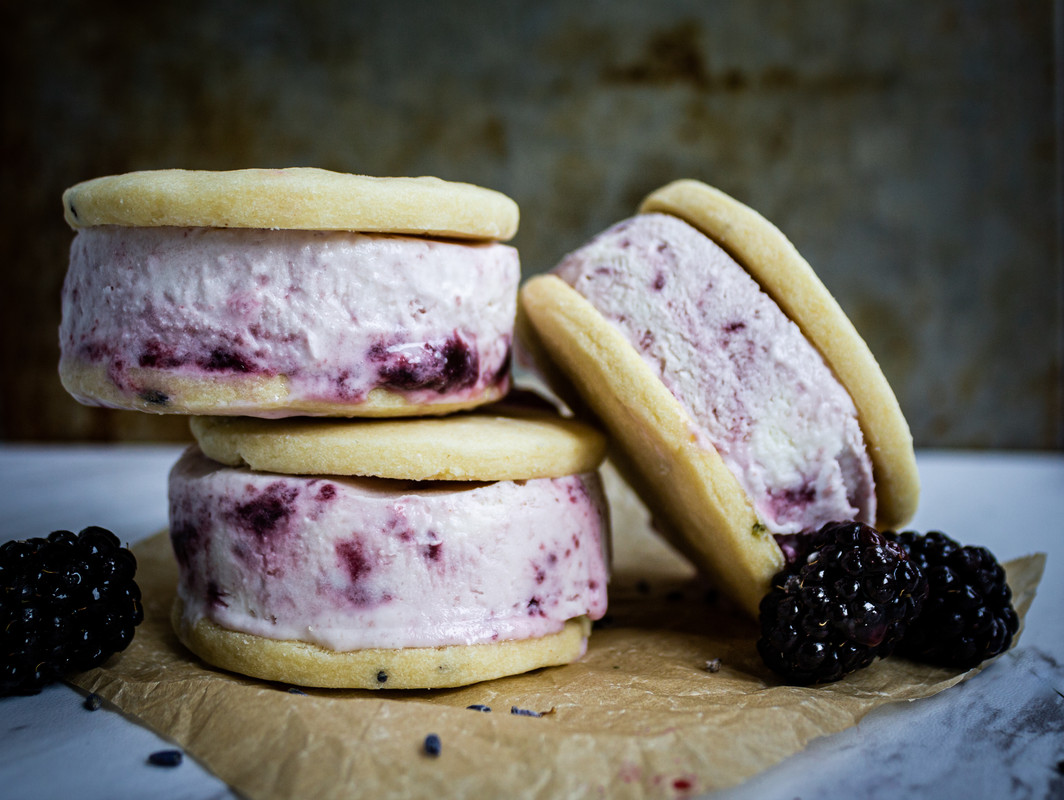
Honee Bee Home challenged me to make a baked treat using lavender, blackberries, gin and ice cream to compliment her Blackberry Lavender Gin Milkshake. Well, challenge accepted!

These grown-up ice cream sandwiches use a variation of my Mamaw's shortbread cookies paired with my homemade Blackberry Gin & Tonic Swirl Ice Cream. Though the components come together quickly, you’ll have to wait a bit—or should—for the ice cream to set or else you might have a sticky, slidey mess. Patience is key here, but they won't disappoint!

IMG_8089.jpg

The boozy Gin & Tonic ice cream is tempered by the blackberry jam and lemon-lime flavoring. For my ice cream, I used lemon-lime flavored soda instead of Tonic Water and was very happy with the results. I took a shortcut and used store-bought seedless blackberry jam. But if you have blackberries, are a jam maker, and want to make your own jam, by all means go for it! I’d recommend making it seedless as the seeds could add a mouthfeel (and annoyance) that you might not enjoy.

 
IMG_7950.jpg
 

Once the cookies are completely cool and the ice cream is set, it’s time to make your sandwiches!

Use the same cookie cutter you used for your cookies to cut out portions of ice cream, sandwich the ice cream between two cookies, and place in freezer until ready to serve.

Like this recipe? Follow me on Instagram for lots more recipes just like this one! And don’t forget to pin this recipe to Pinterest for later by clicking on the image below.

IMG_8076.jpg

Yield: 6
Author: Sweet Tea & Fried Pies
Print
Lavender Blackberry Ice Cream Sandwiches

Lavender Blackberry Ice Cream Sandwiches

These grown-up ice cream sandwiches pair a variation on my Mamaw's shortbread cookies with homemade Blackberry Gin & Tonic Swirl Ice Cream. They take a little time, but I promise they won't disappoint!
Prep time: 10 MCook time: 6 hourTotal time: 6 H & 10 M

Ingredients:

Blackberry Gin & Tonic Ice Cream (makes about 1½ quarts)
  • ½ cup of white sugar (may increase to 1 cup if using tonic water)
  • 2 tablespoons lemon juice
  • 3 tablespoons gin
  • ½ cup tonic water or 7up or other lemon-lime flavored soda
  • 2½ cups heavy cream
  • ⅓ cup seedless blackberry jam
Lavender Shortbread Cookies (makes 12 two-inch cookies)
  • 2 cups of sifted all-purpose flour
  • ¼ teaspoon baking powder
  • 1 cup unsalted butter, soften
  • ½ cup sifted powdered sugar
  • 1 teaspoon lemon extract
  • 1½ teaspoons culinary lavender buds

Instructions:

To Make the Ice Cream
  1. In a large bowl mix together sugar, lemon juice, gin and tonic water or lemon-lime soda. Stir the ingredients until the sugar is dissolved.
  2. Whisk in the cream until it's the texture of a thick shake, but very be careful not to whip it.
  3. Line 2 quart baking pan with plastic wrap. Transfer ice cream base to the pan and smooth ice cream evenly into pan with a spoon. It should be about 1-inch thick. Cover with plastic wrap and place it in your freezer. Freeze until soft the consistency of soft serve—firm but not hard.
  4. Remove from freezer and dot the blackberry jam onto the ice cream and use a knife to create swirls. If your jam is firm, you may need to gently warm it, but allow to cool before adding to ice cream.
  5. Cover with a small piece of plastic wrap, sticking directly to ice cream. Cover with a piece a parchment paper that fits just the surface of the ice cream. Cover the pan tightly with more plastic wrap. Freeze until firm, about 6 hours or overnight.
To Make the Cookies
  1. While the ice cream is setting, make your cookies.
  2. In a medium bowl, sift together flour and baking powder and set aside.
  3. Cream butter and powdered sugar in a large bowl or standing mixer until light and fluffy. Gradually blend in flour mixture.
  4. Stir in lavender buds.
  5. Divide the dough in half and shape into two large balls. Flatten the ball of dough into a ½” thick disk and wrap in plastic wrap. Chill for 2 hours in the refrigerator.
  6. Preheat oven to 300 degrees and line two baking sheets with parchment paper.
  7. Roll the dough out between two sheets of parchment paper, keeping it to a ¼” thickness. Using a 3-inch round cookie cutter, cut and place on prepared baking sheets about 1 inch apart. To keep cookies from spreading, place entire baking sheet of unbaked cookies into the freezer for 5 minutes.
  8. Bake for about 20 minutes. Cookies will be pale but set. 
  9. Cool on baking sheet 2 minutes and then carefully move to a wire cooling rack and allow cookies to fully cool.
Assembly
  1. Once the cookies are completely cool, take out the ice cream from your freezer. Use the same cookie cutter to cut out portions of ice cream, sandwich the ice cream between two cookies, and place in freezer until ready to serve.

Notes:

This ice cream can also be made in an ice cream maker following the manufacturer's instructions.

Calories

869.30

Fat (grams)

66.93

Sat. Fat (grams)

41.98

Carbs (grams)

62.72

Fiber (grams)

1.72

Net carbs

61.00

Sugar (grams)

43.95

Protein (grams)

5.71

Sodium (milligrams)

64.39

Cholesterol (grams)

193.40
Did you make this recipe?
Tag @sweetteafriedpies on instagram and hashtag it #sweetteafriedpies
Created using The Recipes Generator

Flourless Monster Cookies

Flourless Monster Cookies

JUMP TO RECIPE | PRINT RECIPE

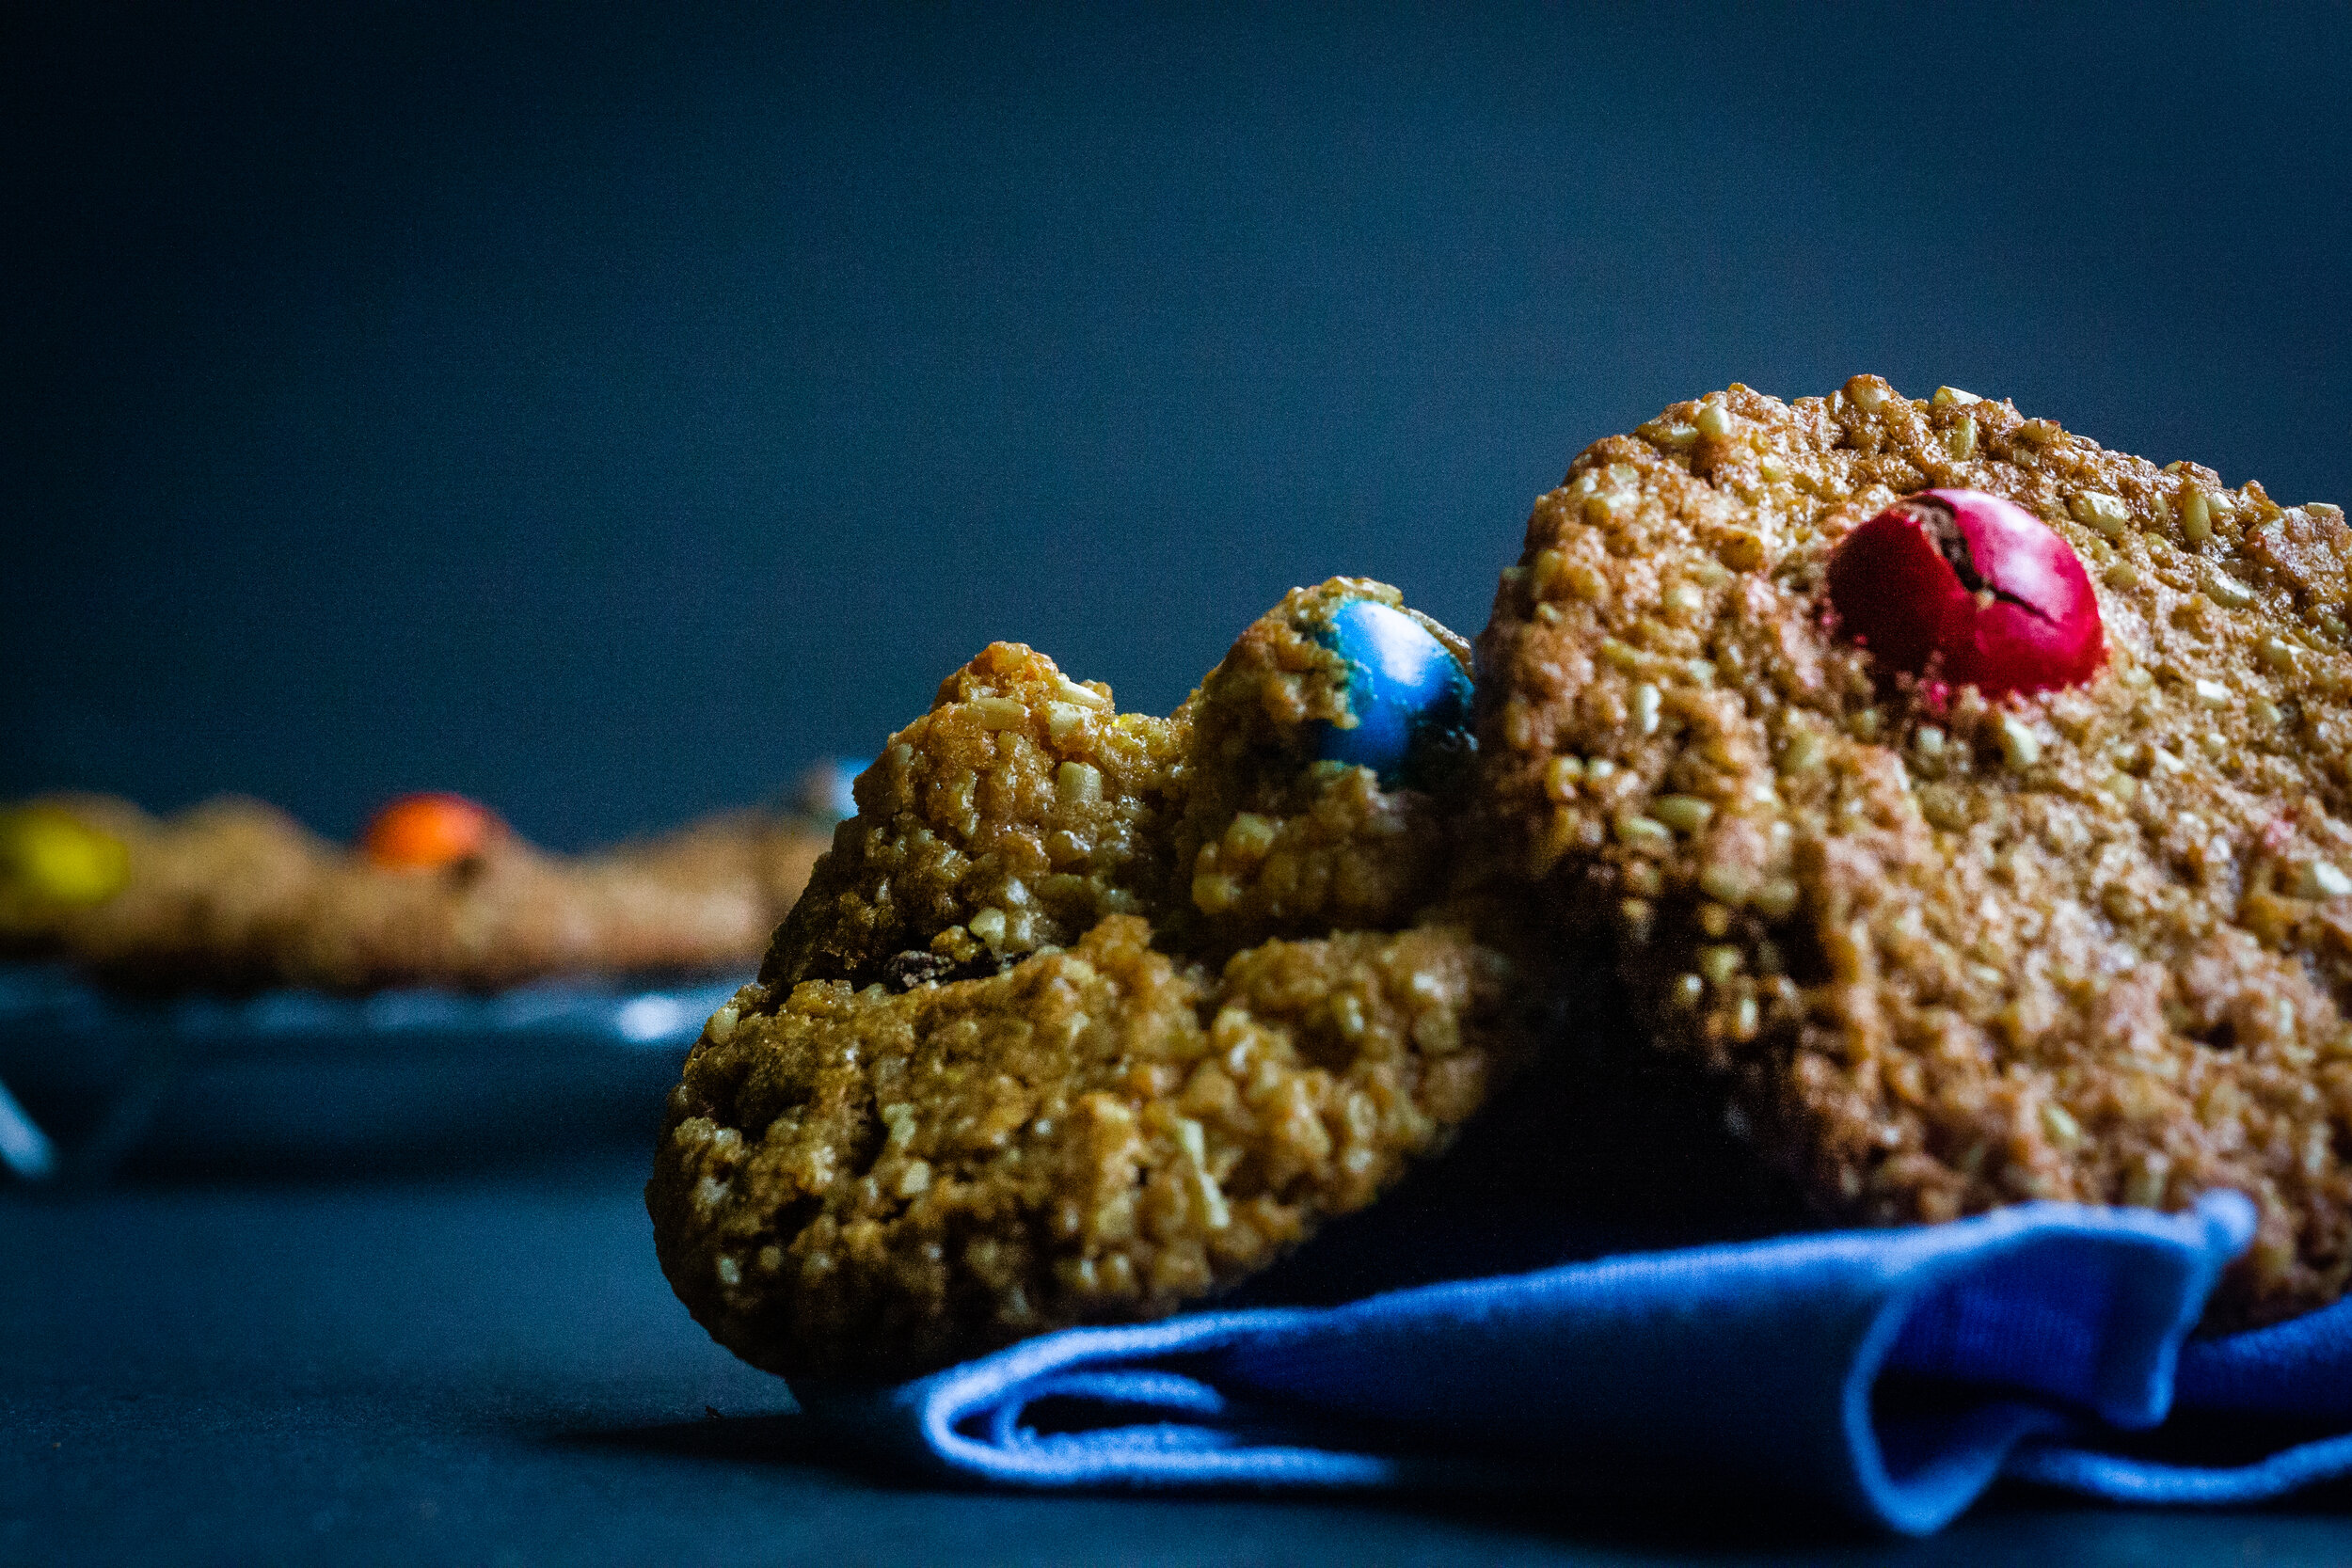
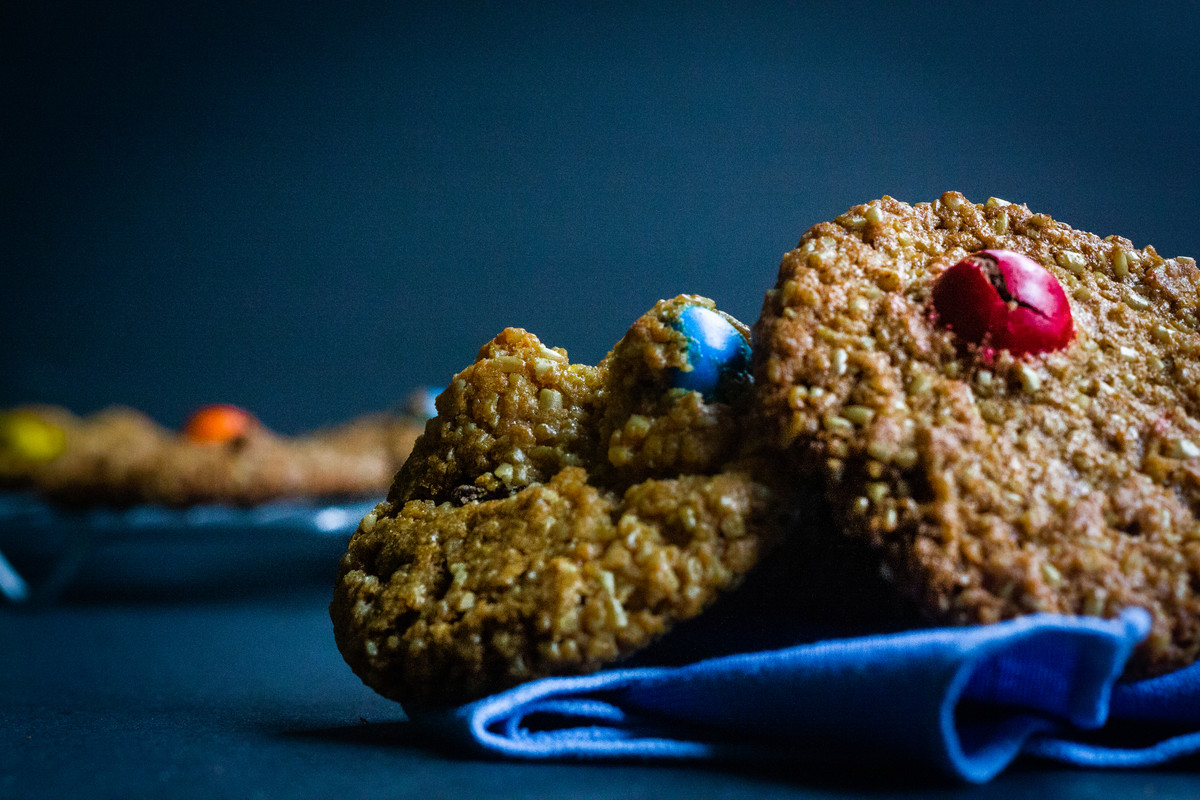
My mom recalls these cookies as a staple after school treat. And as a super special treat, my Mamaw would sandwich vanilla ice cream between two cookies, wrap them in wax paper and store them in bread bags in the freezer.

Chewy, peanut buttery and chocolaty, they can be a bit messy to make but totally worth it. Be sure to use quick oats to get the best consistency. These cookies can be made any size—and are great with ice cream! 

IMG_4658.jpg

To make ice cream sandwiches, place 1 scoop of ice cream (about 1/3 cup) between 2 cookies of equal size. Gently press cookies together. The ice cream should spread to edge of cookies. Eat immediately, or to save for later, wrap sandwiches individually in plastic wrap. Place in resealable freezer bag.

 
IMG_7838.jpg
 
IMG_7831.jpg

Like this recipe? Follow me on Instagram for lots more recipes just like this one! And don’t forget to pin this recipe to Pinterest for later by clicking on the image below.


Yield: 72
Author: Sweet Tea & Fried Pies
Print
Flourless Monster Cookies

Flourless Monster Cookies

My mom recalls these cookies as a staple after-school treat. Chewy, peanut buttery and chocolaty, they can be a bit messy to make but totally worth it.
Prep time: 5 MCook time: 15 MTotal time: 20 M

Ingredients:

  • ½ cup unsalted butter, softened
  • 1⅓ cups firmly packed brown sugar
  • 1 cup granulated sugar
  • 3 eggs
  • ¾ teaspoons vanilla
  • 2 teaspoons baking soda
  • 4½ cups quick oats
  • 12 ounces candy-coated chocolates

Instructions:

  1. Preheat oven to 350 degrees and line two baking sheets with parchment paper.
  2. Cream butter and sugars in a large bowl or standing mixer until light and fluffy. Add eggs and vanilla. Mix in baking soda and quick oats until fully combined.
  3. Fold in candy-coated chocolates.
  4. Shape into balls about 1 inch in diameter. Place cookies about an inch apart on prepared baking sheets and bake for 12-15 minutes.
  5. Cool on baking sheet 2 minutes and then carefully move to a wire cooling rack to cool completely.
To assemble as Ice Cream Sandwiches
  1. For each ice cream sandwich, place 1 scoop of ice cream (about 1/3 cup) between 2 cookies of equal size. Gently press cookies together. The ice cream should spread to edge of cookies. Eat immediately, or to save for later, wrap sandwiches individually in plastic wrap. Place in resealable freezer bag.

Calories

72.73

Fat (grams)

1.83

Sat. Fat (grams)

0.93

Carbs (grams)

13.47

Fiber (grams)

0.39

Net carbs

13.08

Sugar (grams)

9.19

Protein (grams)

0.83

Sodium (milligrams)

52.19

Cholesterol (grams)

11.16
Did you make this recipe?
Tag @sweetteafriedpies on instagram and hashtag it #sweetteafriedpies
Created using The Recipes Generator

Bee Sweet Honey Cake

Bee Sweet Honey Cake

JUMP TO RECIPE | PRINT RECIPE

Cake and cocktails go hand in hand just as nature intended. And honey and limes? They do, too!

I believe I’ve professed my love of honey before. Honey is so complex; it can be floral, fruity, smoky, woody, spicy, nutty or earthy. It truly depends on where your honey was harvested. For this recipe, I recommend being super choosy about your honey since the honey is the star of this bake.

Clover honey is one of the most highly recognized and typically found on grocery shelves, but if you’re lucky enough to have access to locally-sourced honey, go for it! The flavors are generally bolder and even more complex than its grocery store cousins.


The flavor profile of this cake was inspired Honee Bee Home’s Bee Sweet cocktail. It’s delicious. In her cocktail, the crisp brightness of the lime is tamed by the sweet florally honey. And the rum ups the ante by adding a bit more depth to the honey flavor.

 
IMG_7559.jpg
 

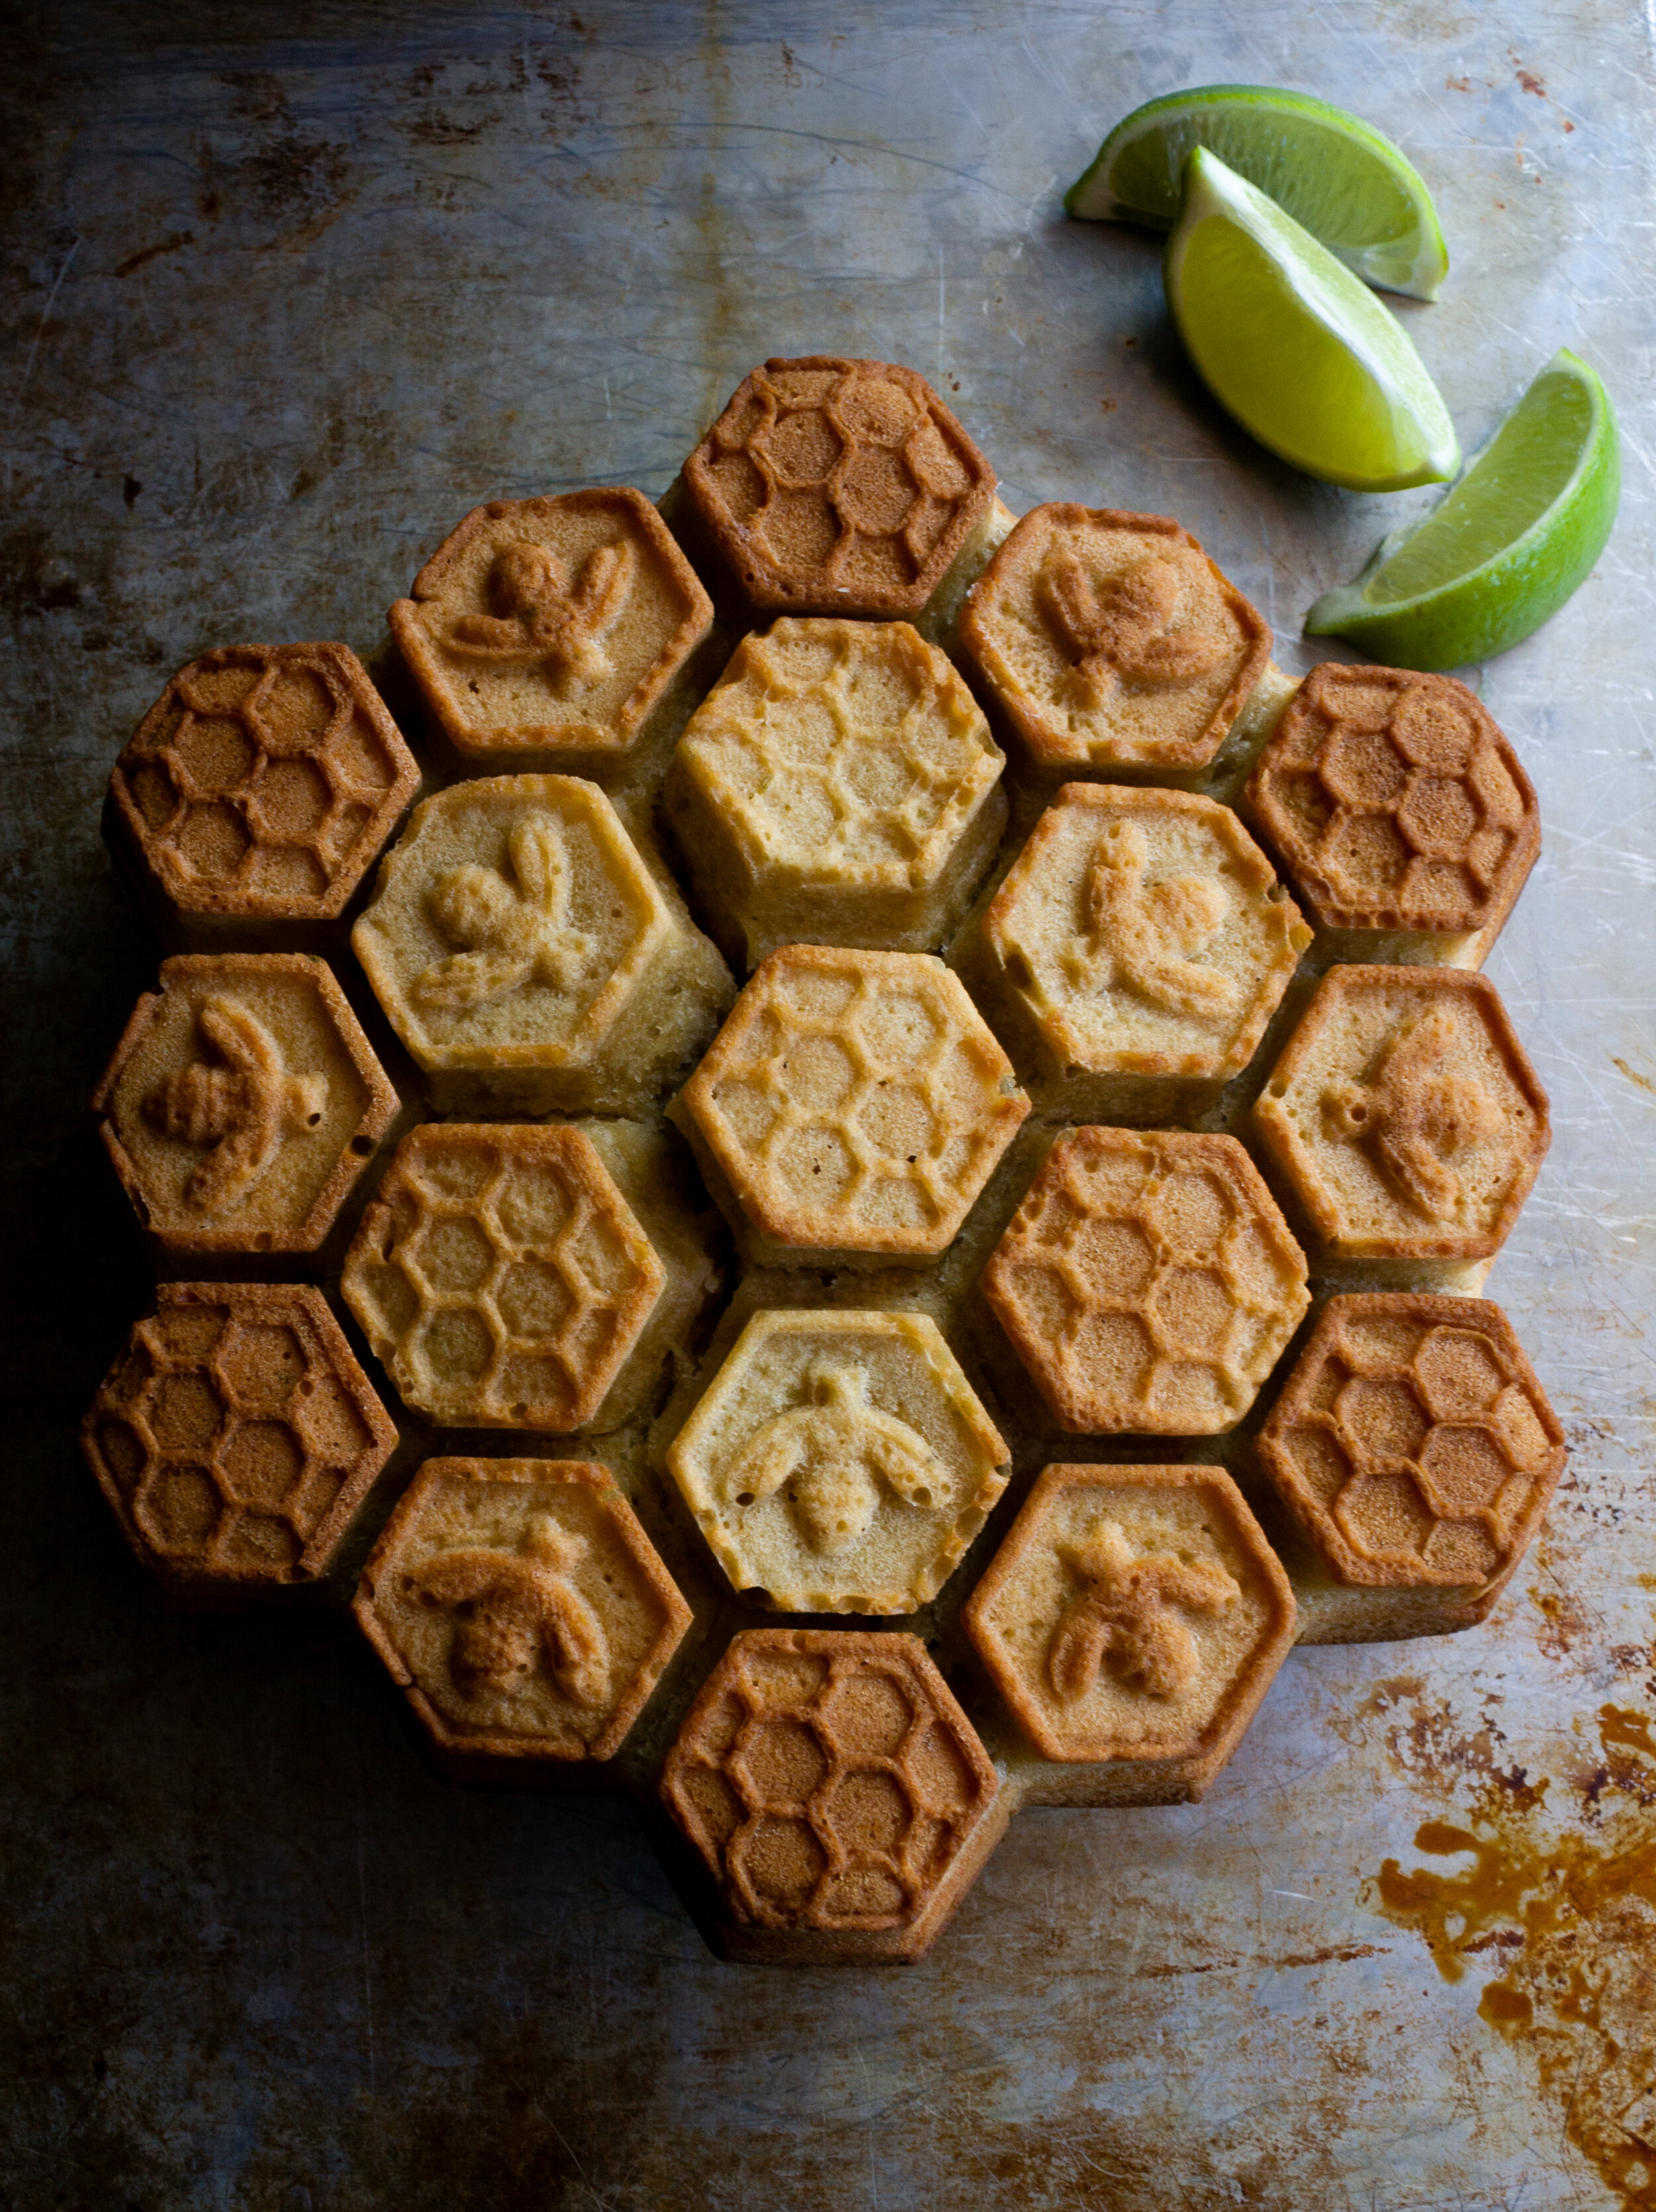
My Bee Sweet Honey Cake is the cake manifestation of her cocktail and combines fresh lime, honey, and a splash of rum. Though you can use a normal 9-inch cake pan for this recipe, I found these cute Honeycomb Cake Molds that were perfect for the occasion!

 
IMG_7519.jpg
 

useful tools for making Bee sweet honey cake

Like this recipe? Follow me on Instagram for lots more recipes just like this one! And don’t forget to pin this recipe to Pinterest for later by clicking on the image below.


Yield: 19
Author: Sweet Tea & Fried Pies
Print
Bee Sweet Honey Cake

Bee Sweet Honey Cake

The flavor profile of this cake was inspired Honee Bee Home’s Bee Sweet cocktail. It’s delicious. And like her cocktail, the crisp brightness of the lime in this cake is tamed by the sweet florally honey. The rum is ups the ante by adding a bit more depth to the honey flavor.
Prep time: 10 MCook time: 45 MTotal time: 55 M

Ingredients:

  • 1¾ cups all-purpose flour
  • ½ teaspoon baking powder
  • ½ teaspoon baking soda
  • ¼ teaspoon salt
  • ½ cup vegetable oil
  • ½ cup honey
  • ¾ cup granulated sugar
  • ¼ cup light brown sugar
  • 2 large eggs
  • ½ teaspoon vanilla extract
  • ½ cup black tea
  • ¼ cup lime juice
  • 4 tablespoons dark rum
  • Zest of 2 limes

Instructions:

  1. Preheat oven to 350°F. Generously grease one 9-inch cake pan or one silicon honeycomb cake mold with non-stick cooking spray.
  2. In the bowl of a standing mixer with the whisk attachment, combine the flour, baking powder, baking soda, and salt until fully incorporated and lump free.
  3. Make a well in the center of the flour mixture with the back of a large spoon, and then add the oil, honey, sugars, eggs, vanilla, tea, lime juice, rum and lime zest.
  4. Using the paddle attachment, mix together until thick, well blended and smooth. 
  5. Place cake pan or mold on a cookie sheet and spoon the batter into the prepared pan.
  6. Bake cakes for 35-45 minutes until a tester comes out clean. Let cake cool 15 minutes before inverting onto a wire rack to cool completely.

Calories

175.60

Fat (grams)

6.37

Sat. Fat (grams)

0.61

Carbs (grams)

27.50

Fiber (grams)

0.54

Net carbs

26.96

Sugar (grams)

17.77

Protein (grams)

1.94

Sodium (milligrams)

82.83

Cholesterol (grams)

19.58
Did you make this recipe?
Tag @sweetteafriedpies on instagram and hashtag it #sweetteafriedpies
Created using The Recipes Generator

Coconut Bourbon Rice Krispies Treats

Coconut Bourbon Rice Krispies Treats

JUMP TO RECIPE | PRINT RECIPE

My sister is the Queen of Rice Krispies Treats. Rice Krispies treats were the first thing she learned to make as a child. Because it was an inexpensive treat, my Mom was more happy to purchase a box of Rice Krispies and marshmallows. It quickly became a beloved summer treat for me and my siblings, and I still get excited when my sister announces that she’s making a round of treats.

When brainstorming new recipes with my sister, we came up with an upgraded, grownup version of our childhood favorite but this time made with browned butter, coconut chips, and a not-so subtle splash of bourbon.

 
IMG_7563.jpg
 

useful tools for making Coconut bourbon rice krispies treat

Like this recipe? Follow me on Instagram for lots more recipes just like this one! And don’t forget to pin this recipe to Pinterest for later by clicking on the image below.

IMG_9578.jpg

Yield: 12
Author:
Print
Coconut Bourbon Rice Krispies Treats

Coconut Bourbon Rice Krispies Treats

These grownup rice krispie treats take your favorite childhood treat and upgrade them with browned butter, a splash of bourbon, and coconut.
Prep time: 5 MCook time: 15 MTotal time: 20 M

Ingredients:

  • 1/2 cup butter
  • 8 1/2 cups mini marshmallows (reserve 1/2 cup) 
  • 3 tablespoons bourbon 
  • 10 cups crispy rice cereal 
  • 1 - 2 cups coconut chips

Instructions:

  1. Line a 9x13 inch baking dish with parchment paper and set aside.
  2. In a very large pot, melt butter over medium heat, stirring constantly, until it's golden brown with a nutty aroma, about 5 minutes.
  3. Reduce heat to low and add the marshmallows, reserving 1/2 cup of marshmallows, and stir until marshmallows are completely melted. Remove from heat and stir the bourbon into the marshmallow mixture.
  4. Add rice cereal, reserved marshmallows, and coconut to the marshmallow mixture and mix until the cereal is evenly coated.
  5. Transfer to the prepared baking dish and using oil or butter-coated fingers or the back of a spoon, gently press until an even layer.
  6. Let cool completely and cut into squares.

Calories

315.52

Fat (grams)

11.11

Sat. Fat (grams)

7.55

Carbs (grams)

52.40

Fiber (grams)

0.86

Net carbs

51.54

Sugar (grams)

25.90

Protein (grams)

2.58

Sodium (milligrams)

255.47

Cholesterol (grams)

20.34
Did you make this recipe?
Tag @sweetteafriedpies on instagram and hashtag it #sweetteafriedpies
Created using The Recipes Generator

No Fail Pie Crust

No Fail Pie Crust

JUMP TO RECIPE | PRINT RECIPE

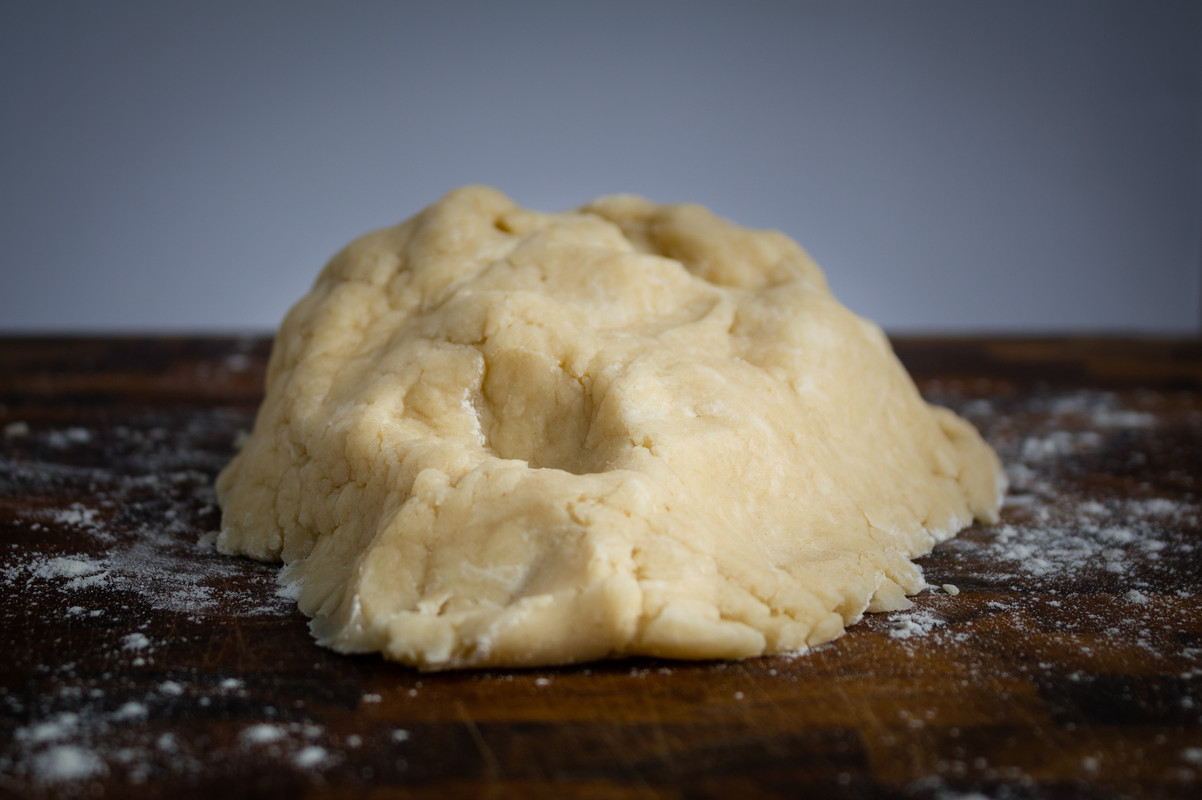
Pie making conjures memories of my Mamaw gently pinching the fat into the flour with her hands and rolling out a disk of dough with her flour-dusted wooden rolling pin. Pies and fried pies were always a special treat for my family—and it all starts with a perfectly flaky, tender crust. This is my Mama’s tried and true pie crust recipe. No fuss, no fail, I promise, no freak-outs included.

Though I’ve modernized her recipe a bit by using a food processor instead of a pastry blender, the crust still turns out exactly like how my Mamaw made it.

IMG_7201.jpg

tips for making no fail pie crust

A light, crisp finish is your goal for your pie crust. The full recipe is below, but here are some tips to ensure your No Fail Pie Crust turns out perfectly each time. 

  • The shortening’s job in this crust is to prevent gluten from forming, which makes gummy or chewy end products like fluffy breads and soft cookies. We don’t want that here, and the shortening gets you to that flaky and crisp texture.  

  • A food processor does a very good job of cutting shortening into the flour, but be careful not to overwork the dough. As soon as the dough begins to form a clump, stop. If your crust ends up tough after baking, you’ll know you went too far. It’s okay. Just top it with a scoop of ice cream, and move on. You’ll get it right next time.

  • The 10-minute resting period is absolutely essential. It helps relax the gluten or else your pie crust will be victim to shrinkage or sagging.

  • Unbaked pie dough can be stored up to three days in the refrigerator and up to 6 months in the freezer. Bring the dough to room temperature before rolling out. I like to have fried pie dough at the ready, so I take the extra step of rolling and cutting my dough into 4 to 6 inch circles, lightly flouring them on both sides, and then wrapping in plastic wrap to freeze until my cravings strike.

IMG_7239.jpg

useful tools for making no fail pie crust

Like this recipe? Follow me on Instagram for lots more recipes just like this one! And don’t forget to pin this recipe to Pinterest for later by clicking on the image below.

No Fail Pie Crust Pinterest Graphic.png

Yield: One 9-inch crust
Author:
Print
No Fail Pie Crust

No Fail Pie Crust

A tried and true pie crust recipe. Modernized a bit with the help a food processor, but still tastes like how my mamaw made it.

Ingredients:

  • 2 cups all-purpose flour
  • 1 teaspoon salt
  • ¾ cup shortening
  • ⅓ cup ice water

Instructions:

  1. Pulse flour and salt in a food processor, two pulses.
  2. Pulse in half of the shortening until it looks like cornmeal. Then pulse in the remainder of the shortening until it looks like peas.
  3. Add water one tablespoon at a time, blending flour and water until evenly dampened and the dough clumps.
  4. Shape dough into a firm ball and let rest for 10 minutes before rolling.

Notes:

To store, form into a disk and wrap tightly in plastic. Dough can be refrigerate for up to three days. Let chilled dough soften slightly by sitting on the counter for about 10 minutes. Wrapped dough can be frozen for up to six months. If frozen, let dough thaw completely on the counter before rolling.

Calories

2293.75

Fat (grams)

156.20

Sat. Fat (grams)

62.35

Carbs (grams)

190.78

Fiber (grams)

6.75

Net carbs

184.03

Sugar (grams)

0.68

Protein (grams)

25.83

Sodium (milligrams)

2123.01

Cholesterol (grams)

86.10
Did you make this recipe?
Tag @sweetteafriedpies on instagram and hashtag it #sweetteafriedpies
Created using The Recipes Generator

Bake While You Sleep Cookies

Bake While You Sleep Cookies

JUMP TO RECIPE | PRINT RECIPE

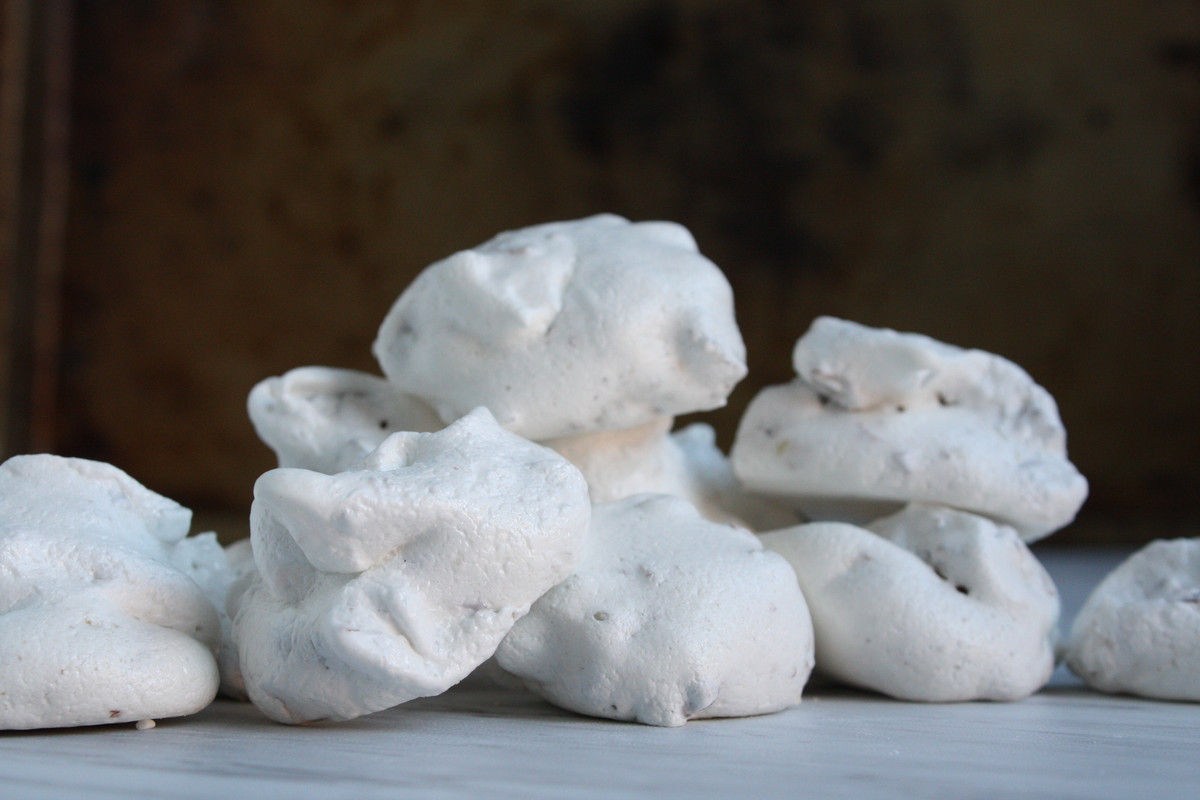
Like little nut-dotted clouds, these are easily the most elegant and richest cookies I’ve ever made.  They literally do bake while you sleep. Go with it. It works. 

Bake While You Sleep.jpg

I get slightly nervous whenever I hear the words “meringue”—and when the cast members of my favorite baking show causally toss around “French Meringue,” “Swiss Meringue,” and “Italian Meringue” in their conversations with the hosts, I watch in awe as they confidently decide between the three.  

So what’s the difference?

These cookies are actually drops of French meringue that are baked. French Meringue is made by mixing egg whites with granulated sugar. It’s not as stable as Swiss or Italian Meringues, but it’s generally smoother, silkier, and lighter. Swiss Meringue is prepared by beating egg whites and sugar in a pan that sits above boiling water. It’s denser than French meringue but great as a base for buttercream frostings. Lastly, Italian Meringue is made by mixing egg whites with hot sugar syrup, and is great for topping pies and frostings. 

For these cookies, the French meringue drops are baked, or more accurately, dried in a relatively cool oven, which gives these cookies their crispy crust and soft, light interior. As a bonus, the chopped nuts add to the texture of these cookies. Try using chopped walnuts, pecans, or—for a summertime treat—lime zest. 

meringue+edited.jpg

tips for making Bake while you sleep cookies

The steps to making meringue are pretty simple. The full recipe is below, but here are some tips to ensure your Bake While You Sleep Cookies turn out perfectly each time. 

  • For the very best results, use room temperature eggs. 

  • To avoid graininess that sometimes plagues meringue slowly add the sugar, one tablespoon at time.

  • The type of bowl you use matters! Go with metal or glass, and if you have a copper bowl—even better! Make sure your bowl and whisk are clean and dry. Any moisture can make your meringue soft. 

  • Not only does the bowl matter, so does the weather. Dry days are better for meringue making than rainy, humid days. 

  • You’ll know when your meringue is ready when it is glossy and forms short peaks. 

  • Be very gentle when folding in the chopped nuts by hand. You don’t want to knock the air out of your beautifully whipped eggs. 

  • Parchment paper is a must! Otherwise it will absolutely stick to your baking sheet. 

  • Bake While You Sleep Cookies can be stored at room temperature in an airtight container for three weeks or frozen for up to six months.

useful tool for making bake while you sleep cookies

Like this recipe? Follow me on Instagram for lots more recipes just like this one! And don’t forget to pin this recipe to Pinterest for later by clicking on the image below.

While You Sleep Cookies Pinterest Graphic.png

Yield: 48 cookies
Author:
Print
Bake While You Sleep Cookies

Bake While You Sleep Cookies

Like little nut-dotted clouds, these are easily the most elegant and richest cookies I’ve ever made. They literally do bake while you sleep. Go with it. It works.
Prep time: 15 MCook time: 6 hourTotal time: 6 H & 15 M

Ingredients:

  • 2 egg whites
  • ¼ teaspoon cream of tartar
  • pinch of salt (about 1/8 teaspoon)
  • ⅔ cup granulated sugar
  • 1 teaspoon vanilla
  • 1 cup chopped nuts

Instructions:

  1. Preheat oven to 375 degrees and line two baking sheets with parchment paper.
  2. Using a standing mixer, beat egg whites until creamy. Add cream of tartar and salt. Beat well, gradually adding sugar, one tablespoon at a time. Beat until very stiff peaks form. Add vanilla, and gently fold in chopped nuts.
  3. Place cookie sheets in oven and then turn oven off.
  4. Leave in oven all night (about 6 hours). No peeking!

Calories

28.76

Fat (grams)

1.51

Sat. Fat (grams)

0.24

Carbs (grams)

3.41

Fiber (grams)

0.20

Net carbs

3.21

Sugar (grams)

2.92

Protein (grams)

0.71

Sodium (milligrams)

12.70

Cholesterol (grams)

0.00
Did you make this recipe?
Tag @sweetteafriedpies on instagram and hashtag it #sweetteafriedpies
Created using The Recipes Generator

Lemon Cardamom Pistachio Wedding Cookies

Lemon Cardamom Pistachio Wedding Cookies

JUMP TO RECIPE | PRINT RECIPE

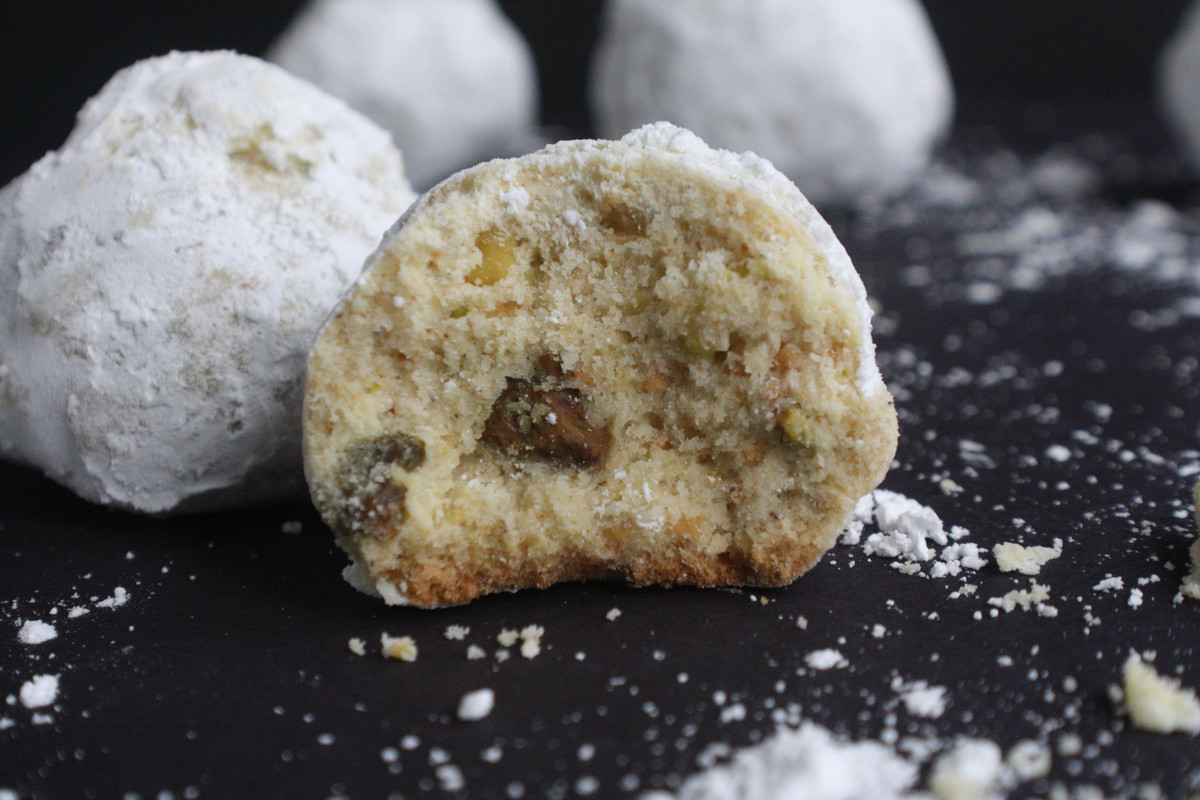
Cardamom is one the world’s oldest spices, dating back 4000 years.  It’s incredibly citrusy, spicy flavor and aromatic fragrance is punctuated by additional zing of the lemon and saltiness of the pistachios in these cookies.  

Lemon Cardamon Wedding Cookie 02.jpg

These Lemon Cardamom Wedding Cookies are variation on the Russian Tea Cake, with very similar variations as Mexican wedding cakes, butterballs or snowballs, which are all spherical shortbread cookies covered in powdered sugar.  By the 20th century, they were a part of weddings, Christmas celebrations and Easter traditions in the United States. 

Lemon cardamon wedding cookies_01 by Kylia Kummer

tips for making wedding cookies

The full recipe is below, but here are some tips to ensure your Lemon Cardamom Pistachio Wedding Cookies turn out perfectly each time. 

  • Use dried lemon zest for your lemon sugar, you’ll be happier with the results. 

  • As a general rule of thumb, it’s best to bake cookies one sheet at a time in the center rack of your oven. If your oven is like mine, you probably have hot spots, or places in your oven that tend to make food cook faster than other. If so, rotate your baking sheets about two-thirds of the way through cooking.

  • Cool your cookies on wire rack. Don’t have one? Invest it one. They make a difference, trust me.

  • Wedding cookies can be stored at room temperature in an airtight container or frozen for up to two months.

useful tool for making wedding cookies

Like this recipe? Follow me on Instagram for lots more recipes just like this one! And don’t forget to pin this recipe to Pinterest for later by clicking on the image below.

Lemon Cardamon Cookies Pinterest Graphic-2.png

Yield: 72 cookies
Author:
Print
Lemon Cardamom Pistachio Wedding Cookies

Lemon Cardamom Pistachio Wedding Cookies

Cardamom is one the world’s oldest spices, dating back 4000 years. Its incredibly citrusy, spicy flavor and aromatic fragrance is punctuated by additional zing of the lemon and saltiness of the pistachios in these cookies. Baker’s tip: use dried lemon zest for your lemon sugar, you’ll be happier with the results.
Prep time: 15 MCook time: 55 MTotal time: 70 M

Ingredients:

Cookie
  • 2 cups unsalted butter, soften
  • 1 cup powdered sugar
  • 1 tablespoon vanilla extract
  • 2 teaspoons lemon juice
  • 1 teaspoons lemon zest
  • 1 teaspoon orange zest
  • 1½ teaspoons salt
  • 1 teaspoon ground cardamom
  • 4½ cups all-purpose flour
  • 1½ cups chopped pistachios or walnuts
Lemon Sugar
  • 3 tablespoon of dried lemon zest
  • 2 cups powdered sugar

Instructions:

  1. Preheat oven to 350 degrees and line two baking sheets with parchment paper.
  2. Cream butter in a bowl or standing mixer, and gradually add powdered sugar. Mix until fluffy. Stir in vanilla extract, lemon juice, lemon zest, orange zest, salt and cardamom until fully incorporated.
  3. Blend in flour gradually and mix well; stir in pistachios.
  4. Shape into balls using about 1 tablespoon for each cookie. Place cookies about half inch apart on prepared baking sheets and bake for 18 minutes. Cookies will be light colored and slightly golden on the bottom when ready.
  5. While cookies are cooling, make the lemon sugar by mixing the dried lemon zest and powdered sugar. Once cookies are slightly cool, roll them a few at a time in the lemon sugar mixture.
  6. Cookies can be stored in an airtight container. Dredge cookies again in lemon sugar just prior to serving.

Calories

107.95

Fat (grams)

6.46

Sat. Fat (grams)

3.35

Carbs (grams)

11.38

Fiber (grams)

0.52

Net carbs

10.86

Sugar (grams)

4.75

Protein (grams)

1.45

Sodium (milligrams)

56.92

Cholesterol (grams)

13.56
Did you make this recipe?
Tag @sweetteafriedpies on instagram and hashtag it #sweetteafriedpies
Created using The Recipes Generator

Hummingbird Cake

Hummingbird Cake

JUMP TO RECIPE | PRINT RECIPE

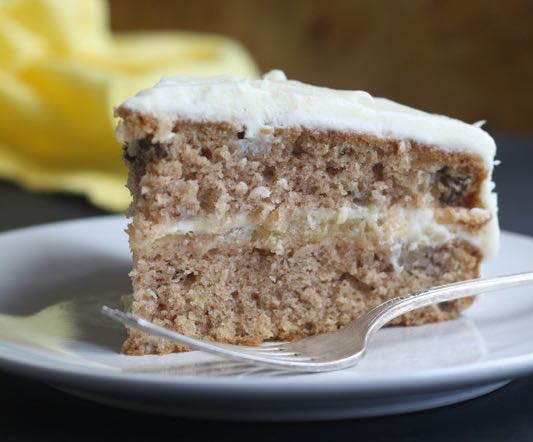
Hummingbird Cake is a cross between banana bread and pineapple upside down cake. This topical cake starts with a spice cake with bursts of pineapple and banana coupled with tender pecans and tangy cream cheese frosting.  My family’s version of this southern favorite takes the pineapple flavor up a notch by adding rum-infused pineapple compote filling. 

Making Hummingbird Cake is amazingly simple, and uses one of my favorite mixing methods called “melted.” Oil-based cakes also utilize chemical leavening and eggs making them extremely moist and fluffy but with enough structure to suspend an abundance of fruit and nuts. Oil is often also used in carrot, zucchini, and pumpkin cakes.

Hummingbird Cake_STFP website.jpg

What is Hummingbird Cake?

Hummingbird Cake was named after Jamaica’s national bird, the doctor bird, which is one of 320 species of hummingbirds. In the late sixties, the Jamaica Tourist Board included the recipe for Hummingbird Cake in media press kits sent to the United States in hopes of bringing more American tourists to the island. 

One of the first known publications of the recipe in the United States appeared in the February 1978 issue of Southern Living.  The recipe was submitted by Mrs. L.H. Wiggins of Greensboro, North Carolina, and later became the most requested recipe in the magazine's history. 

Hummingbird Cake whole.jpg

tips for making Hummingbird Cake

Oil-based cakes, like this one, require a different mixing method than a traditional butter-based cake. If you’re tempted to just dump and mix, don’t! I promise you’ll be happier with the results. The full recipe is below, but here are some tips to ensure your Hummingbird Cake turns out perfectly each time. 

  • One of the crucial steps of making any oil-based cake is emulsifying the oil with the eggs. After you’ve beaten the eggs with the sugar, stream in the oil very slowing while whisking. Whisk until fully incorporated. 

  • If have more time to bake, use fresh pineapple. Buy fresh pineapple chunks in the grocery store produce or prepared foods section. You will still need to crush it at home but it will save the time of peeling and coring a whole fresh pineapple.

  •  The riper the bananas, the better. Ripen bananas by placing them on a cookie sheet with peels left on. Bake in the oven for 12 minutes until the skins are black.

  •  For fluffier results, it’s essential that all ingredients, including eggs, buttermilk and cream cheese, should be room temperature before you get started. 

  •  The cake is done when it shrinks slightly from the sides of the pan. A toothpick or cake tester inserted in the center should come out clean.

  •  Refrigeration tends to dry out cakes, and even though it’s made with buttermilk and cream cheese frosting, Hummingbird Cake does not typically need to be refrigerated if your space is cooler than 70 degrees.

  •  I always use a stand mixer for cake making; however, I do typically fold in heavy ingredients, like pineapple and nuts in this recipe, by hand to make sure I don’t overwork the batter.

IMG_6455.jpg

useful tool for making Hummingbird Cake

Like this recipe? Follow me on Instagram for lots more recipes just like this one! And don’t forget to pin this recipe to Pinterest for later by clicking on the image below.

Hummingbird Cake HP Pinterest Graphic-2.png

Yield: 10-12
Author:
Print
Hummingbird Cake

Hummingbird Cake

This decadent Hummingbird Cake, but not overly sweet cake, features pineapple compote filling with a cream cheese frosting.
Prep time: 30 MCook time: 1 hourTotal time: 1 H & 30 M

Ingredients:

Cake
  • 3 cups all-purpose flour
  • 1 teaspoon baking soda
  • 1 teaspoon cinnamon
  • ½ teaspoon salt
  • 2 cups granulated white sugar
  • 2 large eggs
  • 1½ teaspoon vanilla
  • 1 cup vegetable oil
  • 1 cup buttermilk
  • 2 cups chopped ripe bananas
  • 2 cups drained crushed pineapple
  • 1 cup chopped pecans or chopped walnuts
Filling
  • 1 20-oz can drained crushed pineapple
  • 3 tablespoons rum
  • 1 teaspoon vanilla
Frosting
  • 8 ounces cream cheese, at room temperature
  • ½ cup soften butter
  • 1 to 2 cups powdered sugar
  • 1 teaspoon vanilla

Instructions:

Cake
  1. Preheat oven to 350 degrees.
  2. Prepare a 9-inch round cake pan by tracing the bottom of the cake pan onto parchment paper with a pencil, and cut along the line. Spray the bottom and sides of the pan with cooking spray and line with the prepared round of parchment paper, smoothing out to remove any creases or air bubbles. Spray the parchment paper then add a couple tablespoons of flour and shake it around the pan until the interior surface is lightly and completely covered. Discard any excess flour.
  3. In a large bowl, combine the flour, baking soda, cinnamon, and salt, and whisk until fully incorporated and lump free. Set aside.
  4. In the bowl of a standing mixer fitted with the whisk attachment, whisk together the eggs, sugar and vanilla on medium high until light and thick. Reduce speed to medium-low and gradually stream in oil down the side of the bowl very slowly. Mix until fully incorporated.
  5. Using a paddle attachment add the flour mixture in three additions, alternating with buttermilk in two additions, beginning and ending with the flour mixture. Mix until smooth.
  6. Fold in chopped bananas, pineapples and nuts with a rubber spatula. Scrape batter into prepared pans.
  7. Bake cakes for 35-45 minutes until a tester comes out clean. Let cake cool 10 minutes before inverting onto a wire rack to cool complete.
Filling
  1. Combine the brown sugar, rum, and vanilla in a saucepan. Squeeze the lemon juice into the pan.
  2. Stir to combine the ingredients and bring to a simmer. Add the pineapple and stir until well mixed.
  3. Simmer until the liquid has reduced to a syrupy consistency and the pineapple is soft. Set aside to cool.
Frosting
  1. To make the frosting, beat together cream cheese and butter until smooth. Beat in vanilla extract. Reduce mixer speed to low and gradually mix in powdered sugar. Increase speed to high and beat frosting until light and fluffy.
Assembly & Decoration
  1. Place one cake, domed side down, on a platter. Spread a thin layer of filling over the cake. Start with a couple of tablespoons, then add more as needed to cover surface it'll help you avoid excess filling squeezing out the sides. Alternatively, build a frosting dam by piping a thick ring of frosting around the top edge of the cake. Spread your filling in this dam.
  2. Place remaining cake, domed side down, on top. Spread top and sides with about ¼ cup frosting and chill 30 minutes so that frosting sets. Spread remaining frosting over top and sides.
  3. Use the back of a spoon to add decorative swirls to the sides and top of cake.

Notes:

Hummingbird Cake should be stored in an airtight container or well-covered with plastic wrap to protect it from drying out. It can be stored at room temperature (if less than 70 degrees F) for two days or will last in the refrigerator for up to one week. Let cake (slices) come to room temperature before serving.

Calories

772.15

Fat (grams)

33.73

Sat. Fat (grams)

8.58

Carbs (grams)

112.11

Fiber (grams)

2.98

Net carbs

109.13

Sugar (grams)

77.60

Protein (grams)

7.08

Sodium (milligrams)

377.31

Cholesterol (grams)

65.45
Did you make this recipe?
Tag @sweetteafriedpies on instagram and hashtag it #sweetteafriedpies
Created using The Recipes Generator

Plum Upside-Down Cake

Plum Upside-Down Cake

JUMP TO RECIPE | PRINT RECIPE

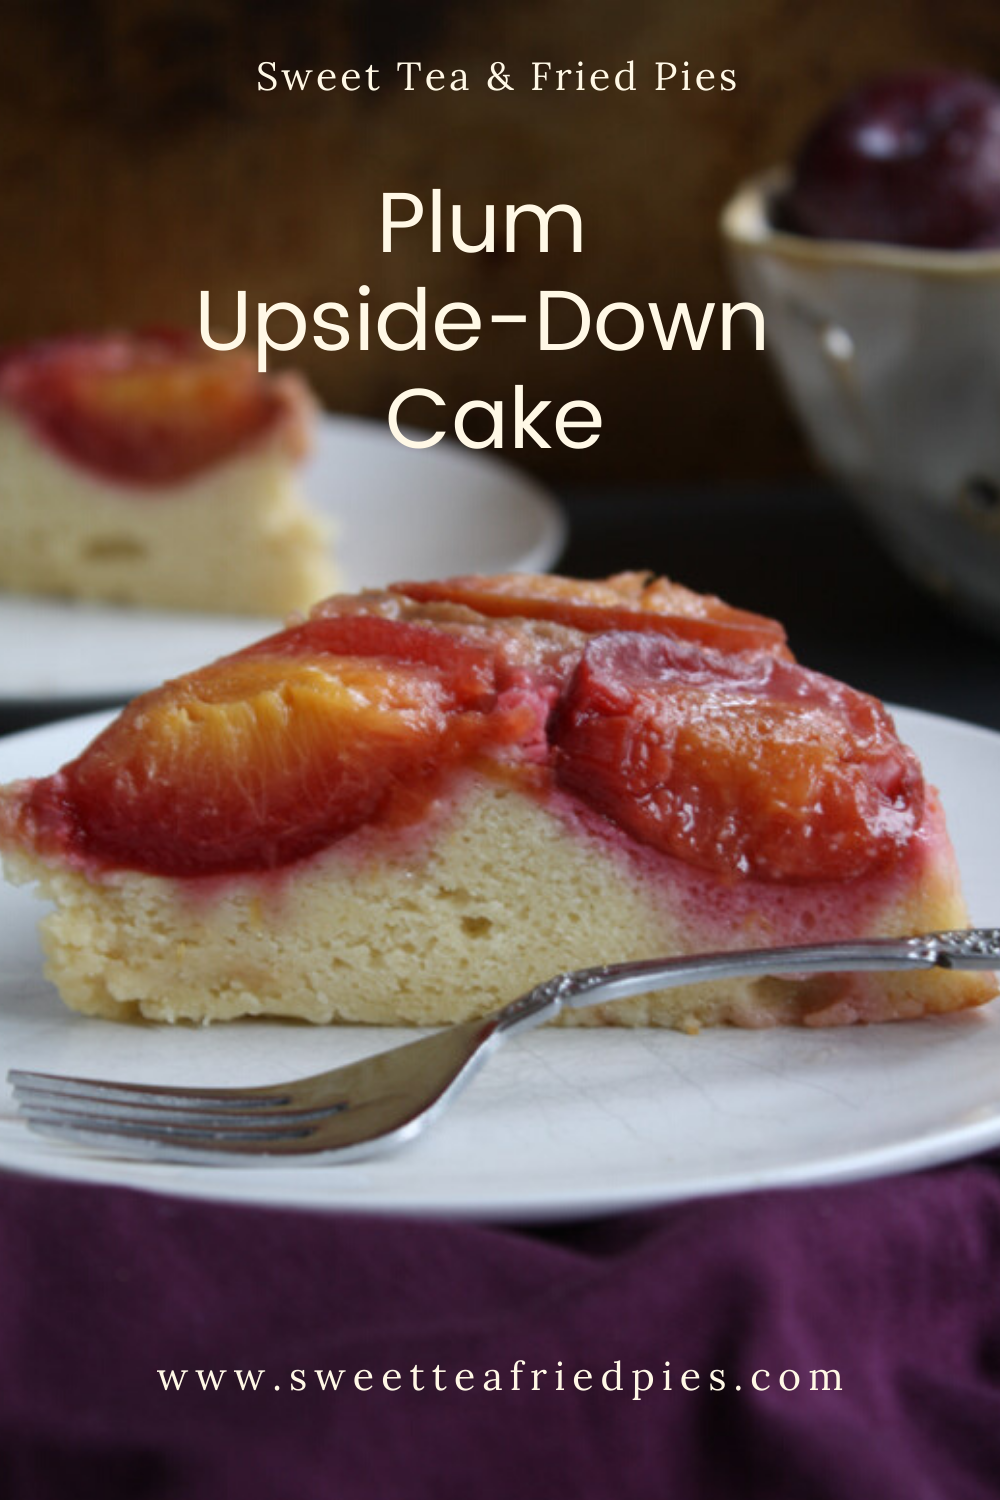
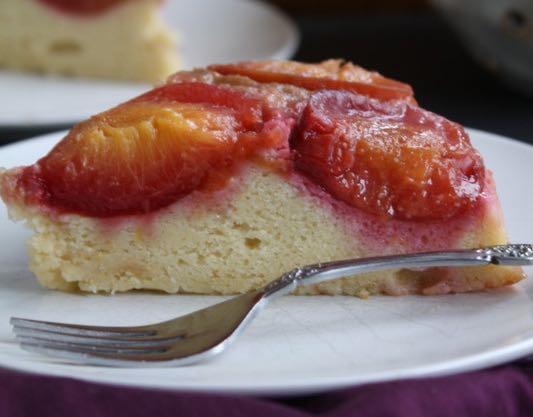
I’d like to stage a protest. National Pineapple Upside-Down Cake is on April 20. Don’t get me wrong, I like pineapple—my HB would agree that there’s absolutely nothing like ice-cold pineapple chunks especially on an oppressively hot summer day. But the syrupy cake’s popularity is overshadowing some potential contenders. Imagine a moist, buttery yellow cake topped with plums soaked in a ginger and rum-infused caramel sauce. If you drooled a little, I won’t tell. But, doesn’t that sound better than limp, canned pineapples and candy sweet cherries? 

This butter-based cake has a pound cake texture. Because of its neutral but rich flavor, I will definitely be making more cakes using this base. Achieving the cake’s lightness is all about creaming, a method of mixing sugar and softened butter.  More about that later. 

IMG_6498.jpg
IMG_6639.JPG

The flavor of this cake is carried by the plums, of course, but also by the butter, ginger, and rum. There are more varieties of plums than any other stone fruit in the world. The overall flavor of your cake will depend on the type of plums you use.  Plums bake well, and standard sweet plums I used blend well with butter.  And butter blends well with the warm, moderate flavor of rum and the hot spice of ginger in the caramel sauce elevate the whole bake. On her recipe card, my Mamaw noted that the cake is perfect on it’s own, but try topped with Greek yogurt or a sprinkle of powdered sugar. 

tips for making plum upside-down cake

So ready to protest with me and make a Plum Upside-Down Cake? The full recipe is below, but here are some tips to ensure your Plum Upside-Down Cake turns out perfectly each time. 

  •  I always use a stand mixer for cake making. I stop mixing when can no longer see streaks of flour, and finish by mixing by hand to make sure I don’t overwork the batter and all the flour is fully incorporated.

  • One of the crucial steps of making any butter cake, like this one, is creaming the sugar and butter. Sprinkle the sugar in slowly. It will turn pale and fluff up in volume as the sugar dissolves.

  • For fluffier results, it’s essential that all ingredients—eggs, buttermilk and butter—should be room temperature before you get started. Take your cold ingredients out at least two hours before you start baking. 

  • You also get to practice your knife skills with this recipe. Use a paring knife to cut the plums in half through the center, twist and separate. Remove the pits. If the pits don't come out easily, use your paring knife to carefully cut them out.

  • Did you know you can peel ginger root with a spoon? Use the back of a teaspoon to scrape the skin of ginger root, and then grate using a fine grater.  

  • The cake is done when it shrinks slightly from the sides of the pan. A toothpick or cake tester inserted in the center should come out clean.

  • Refrigeration tends to dry out cakes. Even though it’s made with buttermilk and butter, Plum Upside-Down Cake does not typically need to be refrigerated if your space is cooler than 70 degrees.

IMG_6622.JPG
IMG_6521.JPG

useful tool for making plum upside-down Cake

Like this recipe? Follow me on Instagram for lots more recipes just like this one! And don’t forget to pin this recipe to Pinterest for later by clicking on the image below.

Plum Upside Down Cake Pinterest Graphic-2.png

Yield: 8
Author:
Print
Plum Upside-Down Cake

Plum Upside-Down Cake

Imagine a moist buttery yellow cake topped with plums soaked in a rum-infused caramel. If you drooled a little, I won’t tell. Perfect on it’s own but try topped with Greek yogurt or a sprinkle of powdered sugar.
Prep time: 15 MCook time: 45 MTotal time: 60 M

Ingredients:

  • 6 to 8 small plums, depending on their size
  • 6 tablespoons unsalted butter
  • ½ cup dark brown sugar
  • 2 tablespoons dark rum
  • 2 teaspoons grated fresh ginger
  • ½ cup unsalted butter, softened
  • 1 cup granulated white sugar
  • 2 teaspoons vanilla
  • 2 large eggs, room temperature
  • 1½ cups all-purpose flour
  • 3 teaspoons baking powder
  • Pinch of salt
  •  1⅓ cup buttermilk, room temperature

Instructions:

  1. Preheat oven to 350 degrees.
  2. Prepare a 9-inch round cake pan by tracing the bottom of the cake pan onto parchment paper with a pencil, and cut along the line. Spray the bottom and sides of the pan with cooking spray and line with the prepared round of parchment paper, smoothing out to remove any creases or air bubbles. Spray the parchment paper then add a couple tablespoons of flour and shake it around the pan until the interior surface is lightly and completely covered. Discard any excess flour.
  3. Use a paring knife to cut the plums in half through the center, twist and separate. Remove the pits. If the pits don't come out easily, use your paring knife to carefully cut them out. Line the bottom of your cake pan with the plums cut sides down so they fit snuggly in the pan.
  4. Make your caramel by combining the dark brown sugar and butter in a heavy saucepan. Cook over medium-high heat until the sugar has dissolved, about 1 minute. Continue to cook, swirling the pan occasionally but never stirring the sugar mixture, until the mixture thickens and is bubbling on top, 3 to 5 minutes. Remove the pan from the heat and stir in the rum and fresh ginger. Pour caramel over plums and set aside.
  5. In the bowl of a standing mixer fitted with the paddle attachment, beat the remaining ½ cup of butter, granulated white sugar and vanilla until light and fluffy. Add eggs, one at a time, beating well after each addition.
  6. In a separate bowl, whisk together flour, baking powder, and pinch of salt.
  7. Gradually add flour mixture to butter mixture, alternating with buttermilk and starting and ending with flour mixture.
  8. Pour cake batter over plum and caramel mixture, and bake for about 45 to 60 minutes until tester inserted in the center comes out clean. Cake should be a light golden color, slightly domed on top and center should spring back to the touch.
  9. The cake top may crack slightly while baking as the moisture releases from the fruit and juices may spill from your cake. To avoid a messy oven clean up, place a cookie sheet on the rack below your cake to catch any spills.
  10. Let cake cool 10 minutes before inverting onto serving plate. Serve topped with yogurt or sprinkle with powdered sugar.
Variation
  1. Not a plum fan? Try apricots, nectarines, pluots, or peaches instead. All will pair nicely with the rum and ginger flavors.

Calories

474.93

Fat (grams)

22.09

Sat. Fat (grams)

13.20

Carbs (grams)

63.43

Fiber (grams)

1.46

Net carbs

61.98

Sugar (grams)

43.97

Protein (grams)

5.98

Sodium (milligrams)

301.36

Cholesterol (grams)

101.52
Did you make this recipe?
Tag @sweetteafriedpies on instagram and hashtag it #sweetteafriedpies
Created using The Recipes Generator

Southern Tea Cakes

Southern Tea Cakes

JUMP TO RECIPE | PRINT RECIPE

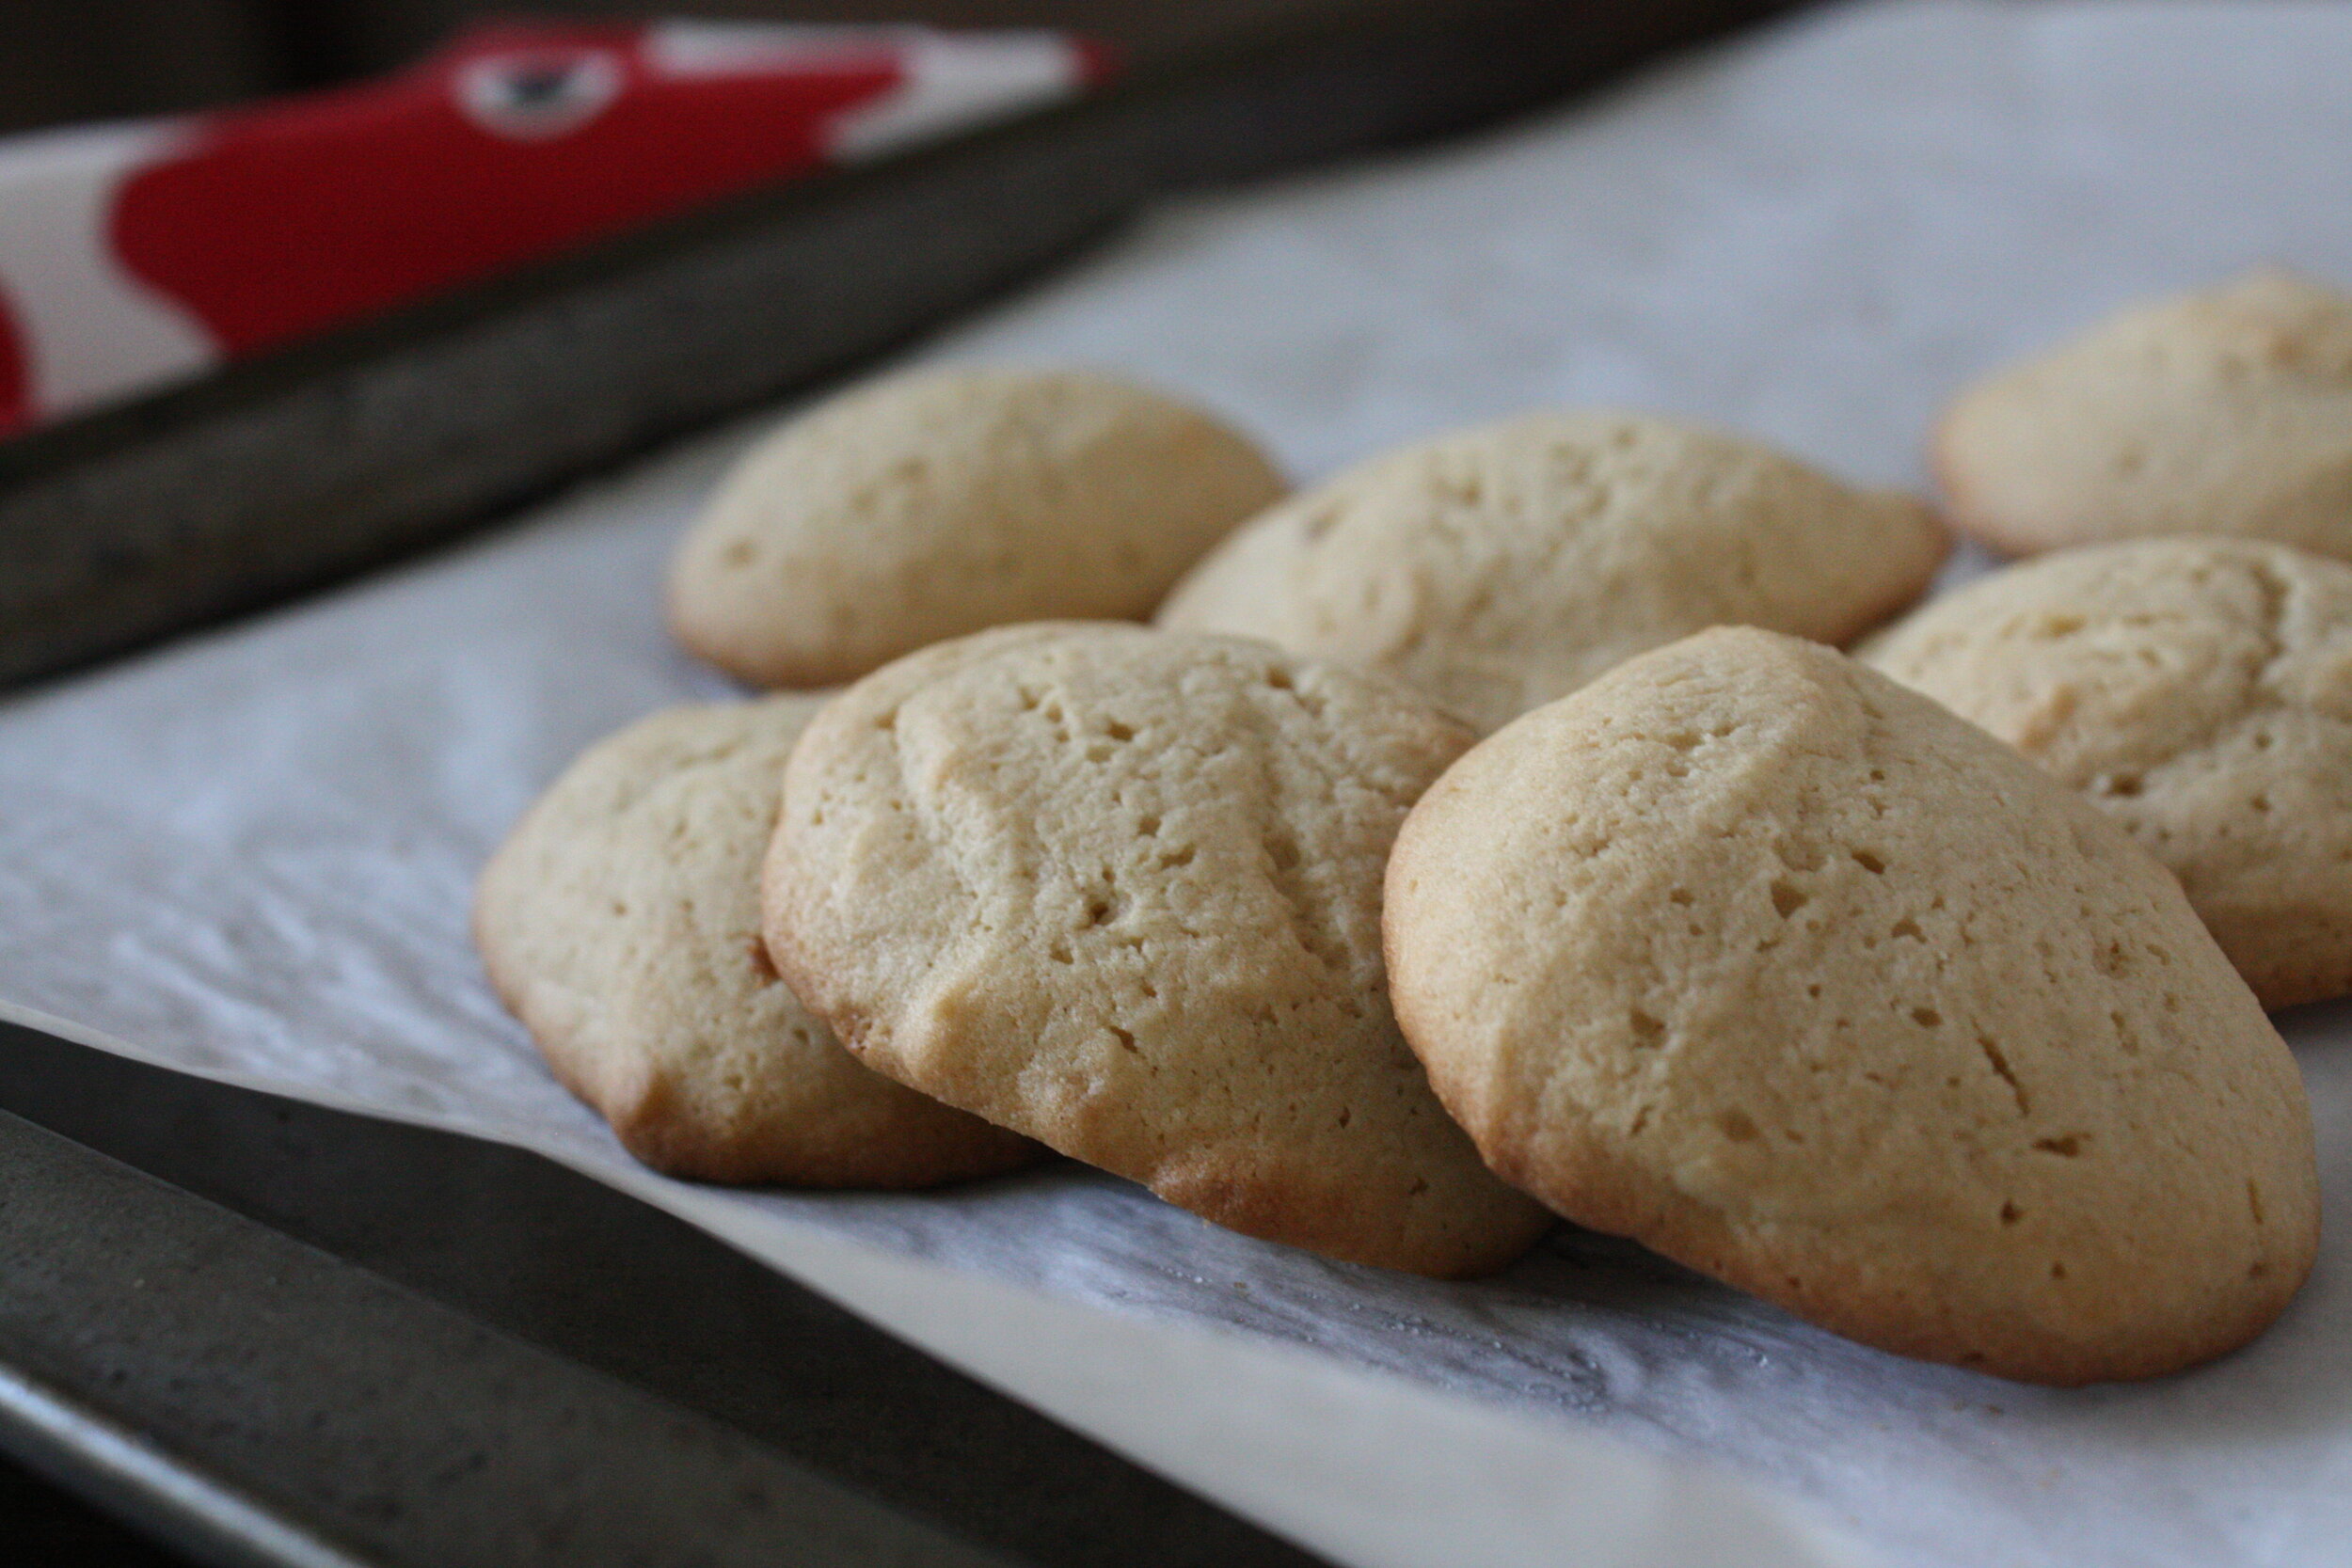
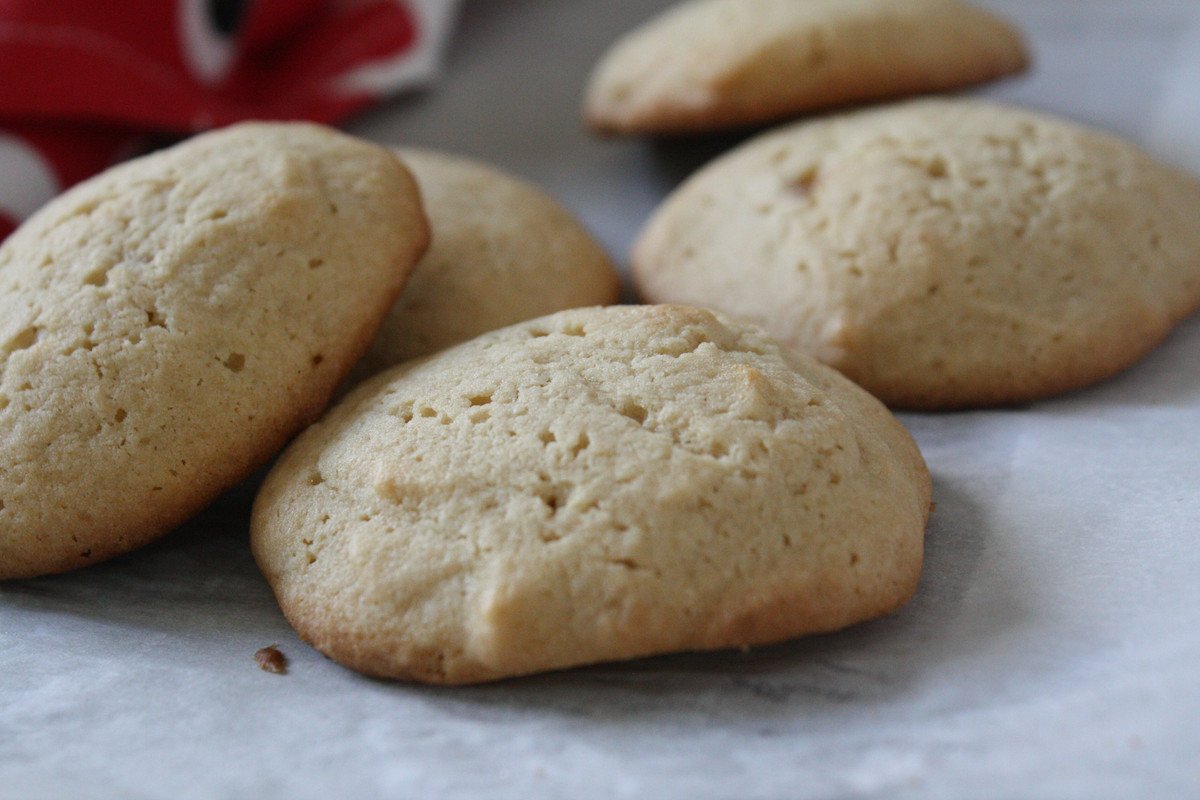
Tea Cakes are as southern as fried green tomatoes, church fans, and syrupy sweet iced tea. But they aren’t really cakes at all—more like an amalgamation of a fluffy biscuit and sugar cookie.

IMG_5677.JPG

I remember mom pulling out the handwritten recipe card that she inherited from her mother, my Mamaw, and whipping up a batch of these budget-friendly after-school treat for my siblings and me. Though as a child, we paired these buttery, subtly sweet treats with fruity sugary drinks or soda, as adult I love them with a cup of lemony hot tea.  

My Mamaw’s Tea Cakes were the very first cookies I learned to bake with my mom. I loved making and eating them as a child, and their simple yet rich taste brought back waves of childhood memories when I made them again for first the time in years with my mom and sister.

For my family, a true Southern Tea Cake is lightly golden brown, tender on the inside, and just-barely crisp on the bottom with slightly brown edges.

Dough Drop - Tea Cakes.JPG

tips for making tea cakes

Every southern family has their own version of Tea Cakes, and this is ours. The full recipe is below, but here are some tips to ensure your Tea Cakes turn out perfectly each time. 

  • Tea cakes will spread while baking, so make sure you space them out on your cookie sheet before baking.

  • It’s always best to bake cookies one sheet at a time in the center rack of your oven. If your oven is like mine, you probably have hot spots, or places in your oven that tend to make food cook faster than other. If so, rotate your baking sheets about two-thirds of the way through cooking.

  • Cool your cookies on wire rack. Don’t have one? Invest it one. They make a difference, trust me.

  • Tea Cakes can be stored at room temperature in an airtight container or frozen for up to two months.

Unbaked+Tea+Cakes.jpg

useful tool for making tea cakes

IMG_5659.JPG

Like this recipe? Follow me on Instagram for lots more recipes just like this one! And don’t forget to pin this recipe to Pinterest for later by clicking on the image below.

Tea Cakes Pinterest Graphic.png

Yield: 16 cookies
Author:
Print
Southern Tea Cakes

Southern Tea Cakes

Passed from my Mamaw to my mother, these were a budget-friendly after-school treat for my siblings and me. I loved them as a child, and their simple yet rich taste bought back waves of childhood memories when I made them again for first time with my mom and sister.
Prep time: 10 MCook time: 24 MTotal time: 34 M

Ingredients:

  • ½ cup unsalted butter, softened
  • ½ cup packed light brown sugar
  • 1 egg
  • 1 cup flour
  • ½ teaspoon baking powder
  • ⅛ teaspoon salt
  • 1 teaspoon vanilla extract

Instructions:

  1. Preheat oven to 375 degrees and line two baking sheets with parchment paper.
  2. Cream butter and brown sugar in a large bowl until light and fluffy; add egg to the creamed mixture.
  3. In a medium bowl, combine flour, baking powder and salt.
  4. Add flour mixture to cream mixture to fully combined and then add vanilla extract.
  5. Using a teaspoon, scoop out the dough and drop on the prepared baking sheets, spacing them evenly to allow for spreading.
  6. Bake one sheet at a time for 10 to 12 minutes, rotating the sheet halfway through baking, until the cookies are golden brown around the edges.
  7. Cool the cookies on the sheets for 10 minutes, and then transfer them to a wire rack to cool completely.

Calories

106.29

Fat (grams)

6.13

Sat. Fat (grams)

3.69

Carbs (grams)

11.66

Fiber (grams)

0.21

Net carbs

11.45

Sugar (grams)

5.60

Protein (grams)

1.27

Sodium (milligrams)

38.09

Cholesterol (grams)

26.88
Did you make this recipe?
Tag @sweetteafriedpies on instagram and hashtag it #sweetteafriedpies
Created using The Recipes Generator

Shortbread Cookies

Shortbread Cookies

JUMP TO RECIPE | PRINT RECIPE

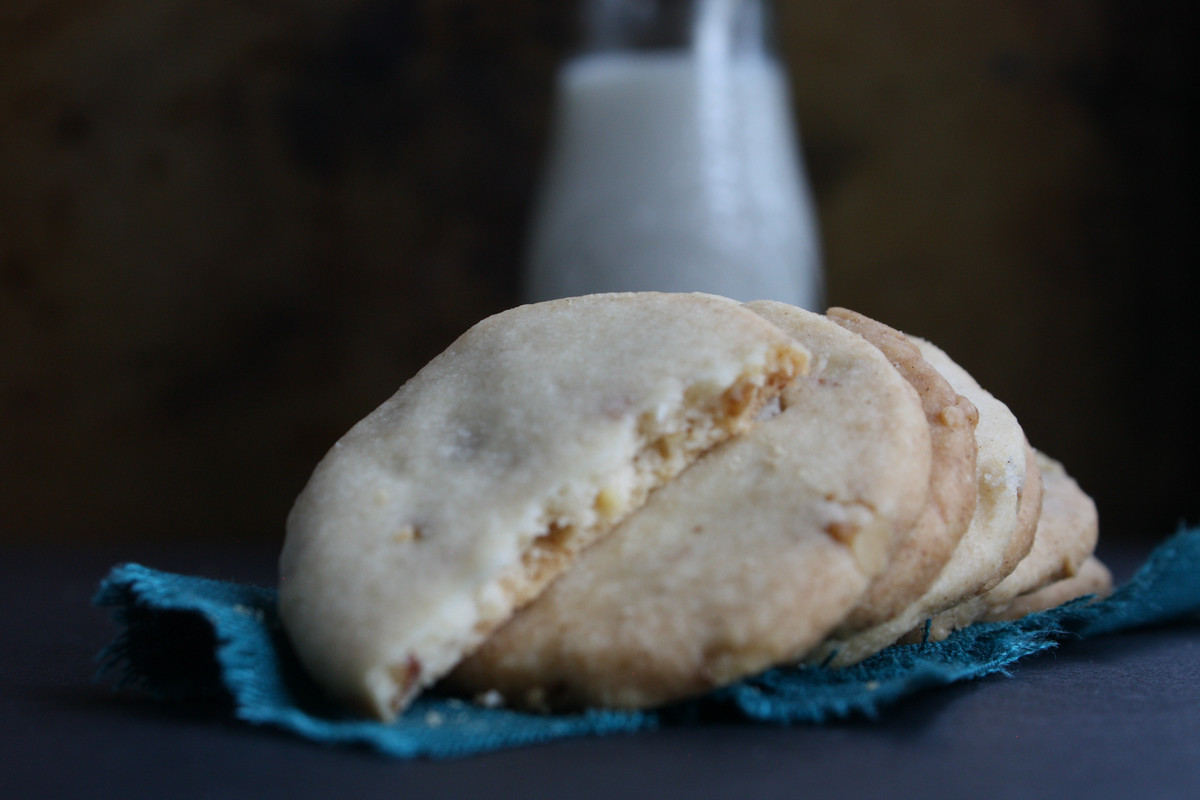
From the crumbly texture to the rich buttery taste, these surprisingly simple Shortbread Cookies are the perfect accompaniment to a nice cup of tea or a glass of Prosecco. The most challenging part of this five-ingredient recipe is waiting patiently through the chilling time.

IMG_4752.jpg

So here’s a little cookie history for you. Shortbread cookies or biscuits may actually go date back to the 12th century. A favorite of Mary Queen of Scots, the first Shortbread recipe appeared in Mrs. McLintock’s Recipes for Cookery and Pastry-Work in 1736. 

At some point, shortbread cookies makers started using butter instead of a leavening agent, like yeast, in their recipes. And Shortbread cookies, as we know them today, get their iconic crumble from that infusion of butter. Butter was pretty expensive back in the day, and still can be, so Shortbread cookies were typically only made for special occasions like Christmas or New Years. I bet this is probably why they remain a popular holiday treat. 

So get that bottle of Prosecco ready, and let’s make some cookies!

tips for making shortbread cookies

Shortbread cookie dough can be made ahead for slice and bake cookies. The full recipe is below, but here are some tips to ensure your Shortbread Cookies turn out perfectly each time. 

  • Sifted flour and powdered sugar are key parts of this recipe’s success. If you don’t have a flour sifter, pour the flour through a mesh strainer and shake into a large mixing bowl to get the lumps out. 

  • To keep your shortbread cookies from spreading, place entire baking sheet of unbaked cookies into the freezer for 5 minutes just before baking. 

  • It’s always best to bake cookies one sheet at a time in the center rack of your oven. If your oven is like mine, you probably have hot spots, or places in your oven that tend to make food cook faster than other. If so, rotate your baking sheets about two-thirds of the way through cooking.

  • Cool your cookies on wire rack. Don’t have one? Invest it one. They make a difference, trust me. 

  • Shortbread cookies can be stored at room temperature in an airtight container or frozen for up to two months.

IMG_4764.JPG

useful tool for making shortbread cookies

Like this recipe? Follow me on Instagram for lots more recipes just like this one! And don’t forget to pin this recipe to Pinterest for later by clicking on the image below.

Shortbread Cookies Pinterest Graphic.png

Yield: 24 cookies
Author:
Shortbread Cookies

Shortbread Cookies

This will be your new go-to shortbread cookie recipe. Simple. Classic. Buttery. Mix things up with a different type of nut, a sprinkle of sugar, or go plain.
Prep time: 2 H & 10 MCook time: 20 MTotal time: 2 H & 30 M

Ingredients:

  • 2 cups of sifted flour
  • ¼ teaspoon baking powder
  • 1 cup unsalted butter
  • ½ cup sifted powdered sugar
  • ½ cup finely chopped walnuts

Instructions:

  1. In a medium bowl, sift together flour and baking powder and set aside.
  2. Cream butter and powdered sugar in a large bowl or standing mixer until light and fluffy. Gradually blend in flour mixture.
  3. Stir in chopped walnuts.
  4. Divide the dough in half and shape into two large balls. Flatten the ball of dough into a ½” thick disk and wrap in plastic wrap. Chill for 2 hours in the refrigerator.
  5. Preheat oven to 300 degrees and line two baking sheets with parchment paper.
  6. Roll the dough out between two sheets of parchment paper, keeping it to a ¼” thickness. Cut into desired shapes and place on prepared baking sheets about 1 inch apart. Sprinkle with granulated or decorating sugar. To keep cookies from spreading, place entire baking sheet of unbaked cookies into the freezer for 5 minutes.
  7. Bake for about 20 minutes.
  8. Cool on baking sheet 2 minutes and then carefully move to a wire cooling rack and allow cookies to fully cool.

Calories

131.02

Fat (grams)

9.40

Sat. Fat (grams)

4.95

Carbs (grams)

10.60

Fiber (grams)

0.45

Net carbs

10.15

Sugar (grams)

2.34

Protein (grams)

1.54

Sodium (milligrams)

6.42

Cholesterol (grams)

20.34
Did you make this recipe?
Tag @sweetteafriedpies on instagram and hashtag it #sweetteafriedpies
Created using The Recipes Generator

Thumbprint Cookies

Thumbprint Cookies

JUMP TO RECIPE | PRINT RECIPE

A holiday classic, this recipe gives an unusual twist to thumbprints cookies by adding a layer of nuts to the shortbread cookie nest. What I love the most about this recipe is the richness of the cookie dough and that you can use any type of jam you want.

These cookies are typically made with butter, flour, baking powder, sugar, vanilla, and raspberry jam, which goes in the indentation (usually made with your thumb) in the middle of each cookie.

IMG_4551.JPG

I’m always fascinated when I bake a cookie that has reigned in popularity for over two hundred years, while traveling the globe with very little adaptation to the recipe. These cookies have done just that.  Thumbprint cookies are also known as hallongrotta, which means "raspberry cave" in Swedish, Polish Tea Cakes, and Butter Balls. Dating back to the nineteenth century or earlier, these cookies were a staple at eastern European coffee parties before becoming the go-to for American cookie exchange parties.

The French bake a version of these cookies called Niçois Suns, which are balls of almond paste rolled in chopped almonds, pressed in the center and baked. A touch of apricot jam in the center of each cookie becomes the sun, which is surrounded by rays of pistachio slivers—hence the name.

I think my grandmother would have been excited to know that her recipe pays homage to both the eastern European version and French version of what we call “Thumbprint Cookies.”

tips for making Thumbprint cookies

These cookies can be made last minute, since there’s no chilling time required. The full recipe is below, but here are some tips to ensure your Thumbprint Cookies turn out perfectly each time. 

  • In this recipe the eggs are separated. That’s to give the cookies their fluffiness. While generally eggs should be at room temperature, cold eggs will be easier to separate. If you don’t have a nifty egg separator, use your hands or a strainer.

  • As a general rule of thumb (see what I did there?), it’s best to bake cookies one sheet at a time in the center rack of your oven. If your oven is like mine, you probably have hot spots, or places in your oven that tend to make food cook faster than other. If so, rotate your baking sheets about two-thirds of the way through cooking.

  • Cool your cookies on wire rack. Don’t have one? Invest it one. They make a difference, trust me.

  • Remember that cookies scorch easily and it may be hard to tell if they’re burning because of the nut covering. Just beware, they may appear slightly under baked when you pull them out of the oven. Go with it, and trust your inner baker. They will firm up as they cool.

  • Thumbprint cookies can be stored at room temperature in an airtight container or frozen for up to two months. 

useful tool for making thumbprints

Like this recipe? Follow me on Instagram for lots more recipes just like this one! And don’t forget to pin this recipe to Pinterest for later by clicking on the image below.

Thumbprint Cookies Pinterest Graphic.png

Yield: 72 cookies
Author:
Thumbprint Cookies

Thumbprint Cookies

A holiday classic, this recipe gives an unusual twist to thumbprints cookies, which date back to the 19th century. Beware, they may appear slightly under baked when you pull them out of the oven, but trust your inner baker.
Prep time: 15 MCook time: 40 MTotal time: 55 M

Ingredients:

  • 1 cup unsalted butter, softened
  • ½ cup packed light brown sugar
  • 2 egg, separated
  • 1 teaspoon vanilla extract
  • 2 cups flour
  • ½ teaspoon salt
  • 1 cup ground pecans
  • Jam of your choice

Instructions:

  1. Preheat oven to 375 degrees and line two baking sheets with parchment paper.
  2. Cream butter and brown sugar in a large bowl until light and fluffy; add egg yolks and vanilla to the creamed mixture. In a medium bowl, combine flour and salt.
  3. Add flour mixture to cream mixture to fully combined.
  4. Slightly beat egg whites and set aside.
  5. Using a teaspoon, scoop out the dough and roll into balls. Dip balls into beaten egg whites and roll in ground pecan and place on the prepared baking sheets, spacing them evenly to allow for spreading.
  6. Bake one sheet at a time for 5 minutes. Remove from oven and press thumb into center and return to oven for 8 minutes.
  7. Add jam to indented center while still on baking sheet and transfer them to a wire rack to cool completely.

Calories

52.97

Fat (grams)

3.76

Sat. Fat (grams)

1.73

Carbs (grams)

4.30

Fiber (grams)

0.24

Net carbs

4.07

Sugar (grams)

1.45

Protein (grams)

0.69

Sodium (milligrams)

17.52

Cholesterol (grams)

11.95
Did you make this recipe?
Tag @sweetteafriedpies on instagram and hashtag it #sweetteapies
Created using The Recipes Generator

Lemon Cream Tart with Berries

Lemon Cream Tart with Fresh Blueberries

JUMP TO RECIPE | PRINT RECIPE

In their 1989 cookbook classic The New Basics, Rosso and Lukins write, “For every chocoholic in the world, there must be one lemonphile.” I am that one.  If I could put lemons in everything, I shamelessly would (and shamelessly do). I love lemons.  I also love creamy desserts and have so much love for cookies that I can’t keep them in the house. Because this tart combines all three, its clearly one of my favorites and, now you know, the way to quickly becoming my new best friend. Using my Mamaw’s nut cookie crust recipe, the combination of a cool creamy filling, subtly sour blueberries, and zesty lemon turns this simple tart into a crowd pleaser—even if you’re not a lemonphile.

This tart works well because of the balance between the berries and lemon. It’s all about volume or, in other words, the intensity of the flavor of each ingredient. Lemons are loud when it comes to its flavor volume while berries are a bit on the quiet side. Because no cooking is required for the filling, this tart also comes together very quickly making it perfect for that summer barbecues you almost forgot about. Lemon enhances many flavors, so it pairs nicely with any type of berries. For a twist, instead of blueberries, try topping this tart with roasted strawberries or sliced kiwi.

IMG-7967.jpg

What is A blind baking?

Making homemade tart crust may seem intimidating, especially when it comes words like “blind baking”. But you don’t scare easily. And with anything, the process becomes much easier and faster after a few tries. You’ll discover the results are well worth the practice.

 Blind baking just means that you’re baking the crust before you add the filling. To blind bake this tart crust, press in your crust and then line it with parchment or aluminum foil. Weigh it down with something, like pie weights, uncooked rice or uncooked beans, so that the bottom doesn’t puff and the sides don’t slouch as you bake it.

Unbaked Cookie Nut Pie Crust copy.JPG

Once the crust is set — and you’ll know because the edges will turn golden brown —remove foil and the weights and let the crust bake a little longer. Look for the bottom to turn a light golden. It should take no more than 15 or 20 minutes.

Huzzah! You’ve just completed a blind bake! I love using a 9-inch fluted tart pan with a removable bottom, and pie weights when I make this recipe.

Lemon+Cream+Tart-2.jpg

tips for making creamy lemon tart

Fruit tarts, like this one, follow a simple formula – an open, sturdy, sweet crust + filling + fruit. The full recipe is below, but here are some tips to ensure your Lemon Cream Tart turns out perfectly each time. 

  • Short crust pastry like the nut cookie crust used in this recipe will puff up during your blind bake. Use pie weights (see above) or prick the crust all over with a fork just before putting in the oven. Use the back of a spoon to smooth down the crust if it puffs up a bit after baking.

  • I don’t typically suggest this when it comes to baking tart shells, but because the fat content is a bit on the lower side, you may want to lightly coat your tart pan with cooking spray before pressing in your pastry. It’ll help with the release.

  • Bake the unfilled tart shell in the middle of your oven. Once baked, the shell should shrink away from the sides of the pan. When the tart is completely cool, remove the outside ring but keep the tart on the bottom pan. It’ll be easier to serve that way.

  • Since you will be using the peel, be sure to scrub your lemon under hot water to remove the wax.

  • The lemon zest adds a totally different dynamic than lemon juice. Juice adds tartness and the zest adds a mellow, perfumed flavor. To zest the lemon, rub the lemon with a fine grater 2 to 3 times to remove the zest. Be careful not to rub too much and get the bitter white pith.

  • The secret weapon to getting gleaming, Instagram-worthy berries atop your tart is jelly. Microwave ¼ to ½ cup of apple jelly for 30 seconds, until liquid. Toss with berries in large bowl, and then spoon over the filling. Chill in the refrigerator for at least 1 hour until the jelly has set. 

useful tool for making lemon tart

Like this recipe? Follow me on Instagram for lots more recipes just like this one! And don’t forget to pin this recipe to Pinterest for later by clicking on the image below.

Lemon Cream Tart Pinterest Graphic.png

Yield: 8
Author:
Lemon Cream Tart with Fresh Blueberries

Lemon Cream Tart with Fresh Blueberries

Cool creamy filling, subtly sour blueberries, and zesty lemon turn this simple tart into a crowd pleaser
Prep time: 40 MCook time: 1 H & 20 MTotal time: 1 H & 60 M

Ingredients:

CRUST
  • ½ cup unsalted butter, softened
  • ⅓ cup packed brown sugar
  • 1¼ cup flour
  • ½ cup chopped pecans or almonds
  • ¼ teaspoon salt
  • ¼ teaspoon baking soda
  • ½ teaspoon vanilla extract
FILLING
  • 8 oz. soften cream cheese
  • ½ cup of plain Greek yogurt
  • ¼ cup powdered sugar
  • 1 teaspoon of lemon extract
TOPPING
  • 1 to 2 cups fresh blueberries
  • 1 teaspoon fresh lemon zest
  • ½ cup apple or blueberry jelly (OPTIONAL)

Instructions:

  1. Preheat oven to 350 degrees. Prepare tart pan by lightly spraying with cooking spray.
  2. To make the crust, cream the butter and brown sugar together in a large bowl until fluffy and fully combined. Stir in other ingredients until crumbly. Transfer the dough to a prepared tart pan and press it over the bottom and up the side all around.
  3. Line the unbaked tart crust with parchment or aluminum foil and weigh it down with pie weights, uncooked rice or uncooked beans, so that the bottom doesn’t puff and the sides don’t slouch.
  4. Bake at 350 degrees for 10 minutes, and then remove aluminum foil and pie weights and bake for additional 10 minutes or until golden brown. Let crust completely cool before filling.
  5. Meanwhile make the filling. Use a hand mixer to combine soften cream cheese and yogurt. Add powdered sugar and lemon extract; mix until thoroughly combined.
  6. Spread filling into a completely cool crust and refrigerate for 1 hour until firm.
  7. Microwave ½ cup of blueberry jelly for 30 seconds, until liquid. Toss with berries in large bowl, and then spoon over the filling. Chill in the refrigerator for at least 1 hour until the jelly has set.
  8. Top lemon zest just before serving.

Calories

332.90

Fat (grams)

18.03

Sat. Fat (grams)

8.36

Carbs (grams)

40.13

Fiber (grams)

1.82

Net carbs

38.30

Sugar (grams)

20.76

Protein (grams)

4.64

Sodium (milligrams)

131.07

Cholesterol (grams)

34.79
Did you make this recipe?
Tag @sweetteafriedpies on instagram and hashtag it #sweetteafriedpies
Created using The Recipes Generator